Once your IT landscape has been discovered and inventory data is available, you can bring your license and purchasing data into Raynet One.
Inventory data provides the technical basis from which license demand is calculated. License contracts and the entitlements derived from them represent the available license rights. License Management (LM) combines contract-derived entitlements with calculated license demand from your inventoried environment to produce your first Effective License Position (ELP).
The following example walks you through a first-time LM flow using a Microsoft Windows Server 2025 Standard invoice: create a license contract, review the generated entitlements, check the generated lifecycle events, understand how demand is calculated, and read the resulting compliance position.
Step 1: Create the license contract
You have received a Microsoft invoice for Windows Server 2025 Standard and want to capture it in Raynet One. For this demonstration, the Enter text input method is used. This method lets you paste invoice data directly into the wizard. SAM AI then extracts the product information, license model, metric, and quantities automatically.
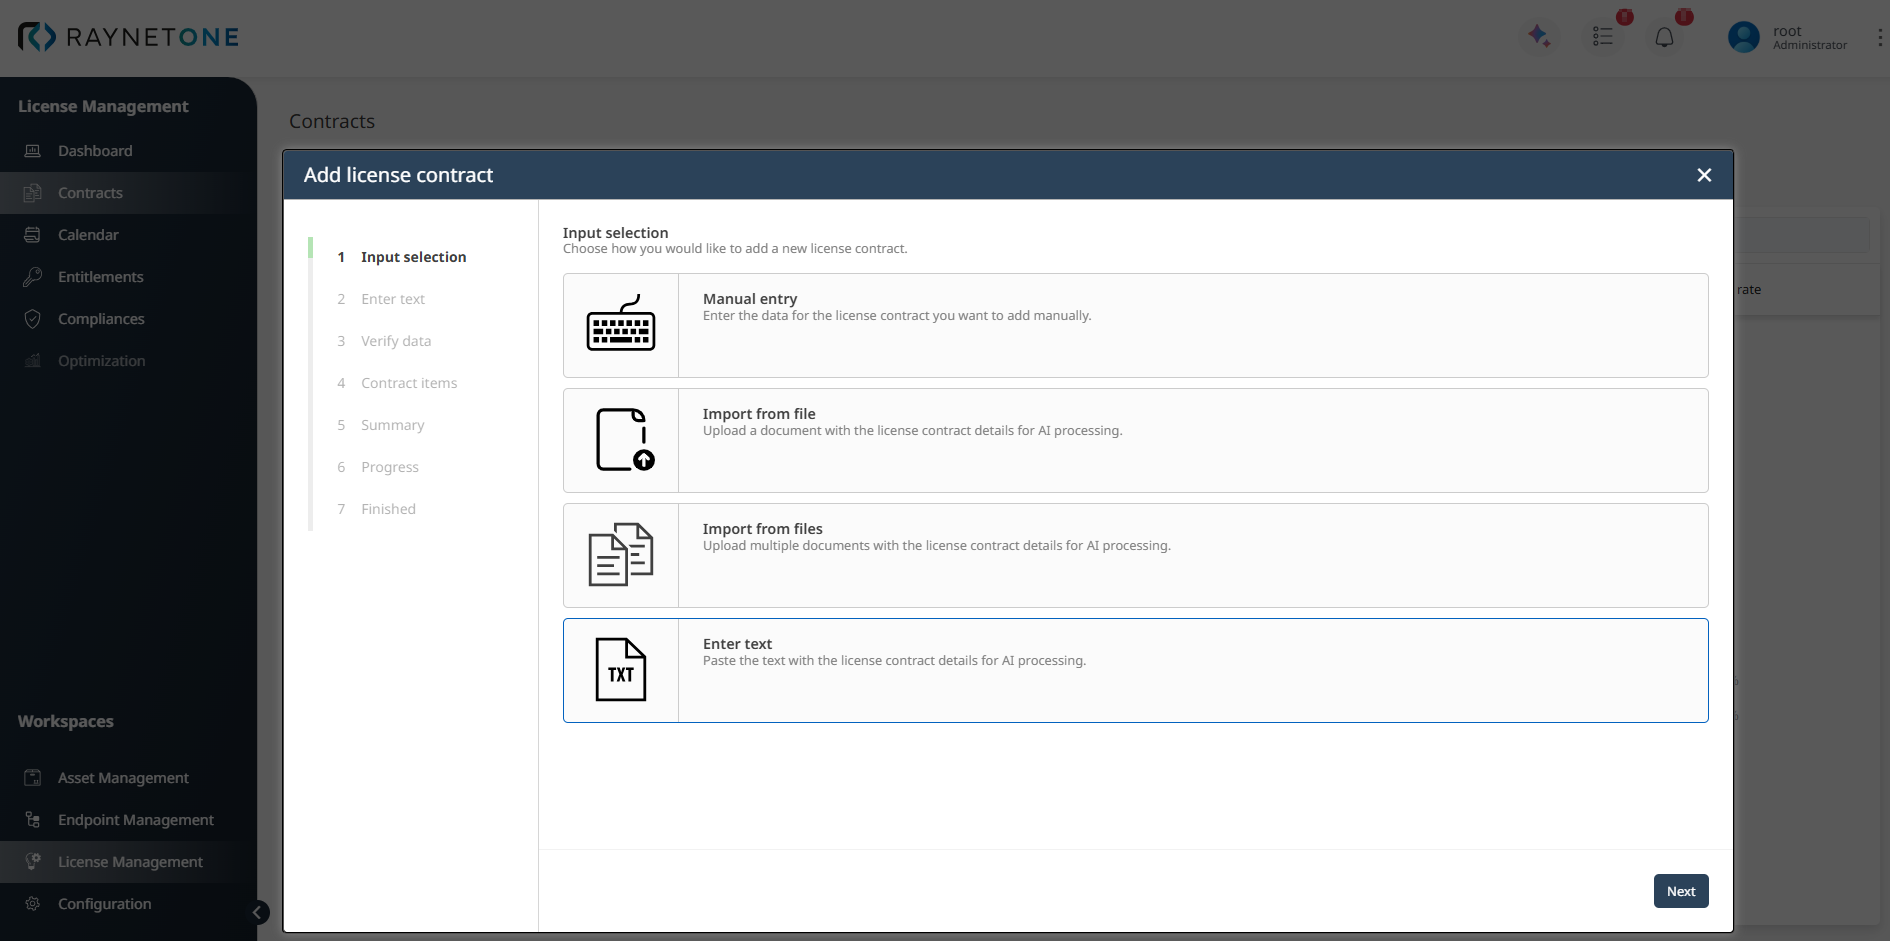
Open Workspaces > License Management > Contracts. Click Add in the toolbar to open the Add license contract wizard. On the Input selection step, choose Enter text.
Paste the invoice text and click the Process button. SAM AI extracts the contract data from the text. Once processing is complete, the wizard automatically advances to the next step.
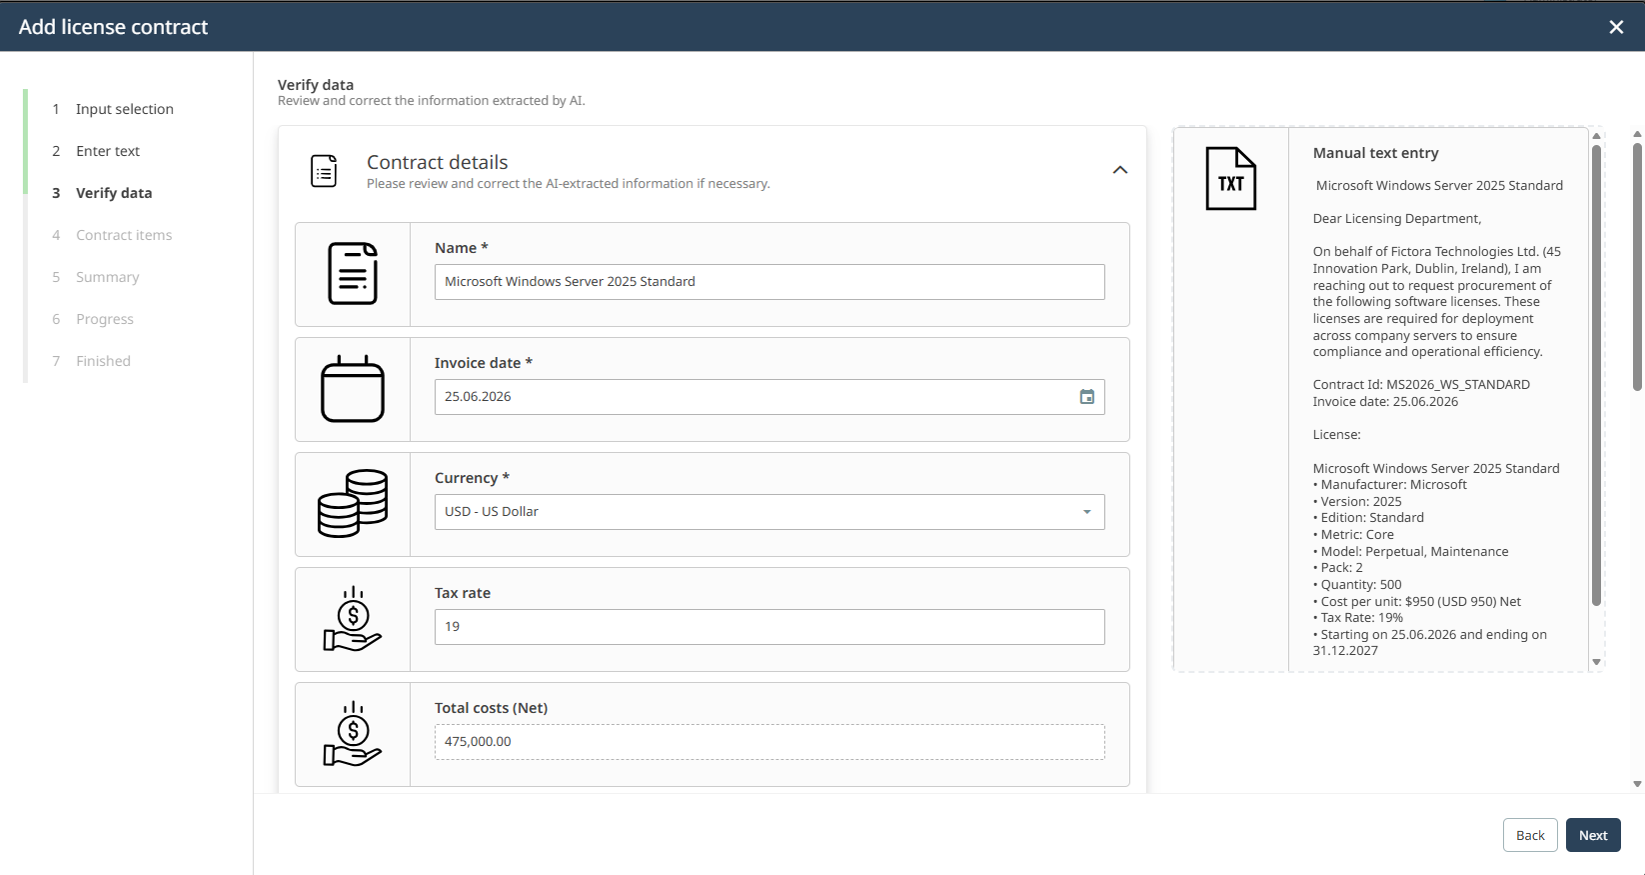
On the Verify data step, review the extracted contract details. At this stage, SAM AI pre-fills all contract-level fields, including the contract name, Contract ID, invoice date, supplier and customer information, currency, tax rate, and total costs.
The original invoice text remains visible on the right side, so you can compare the extracted values with the source text. Review each field and correct any extraction errors. When all extracted contract details are correct, click Next.
|
Note: |

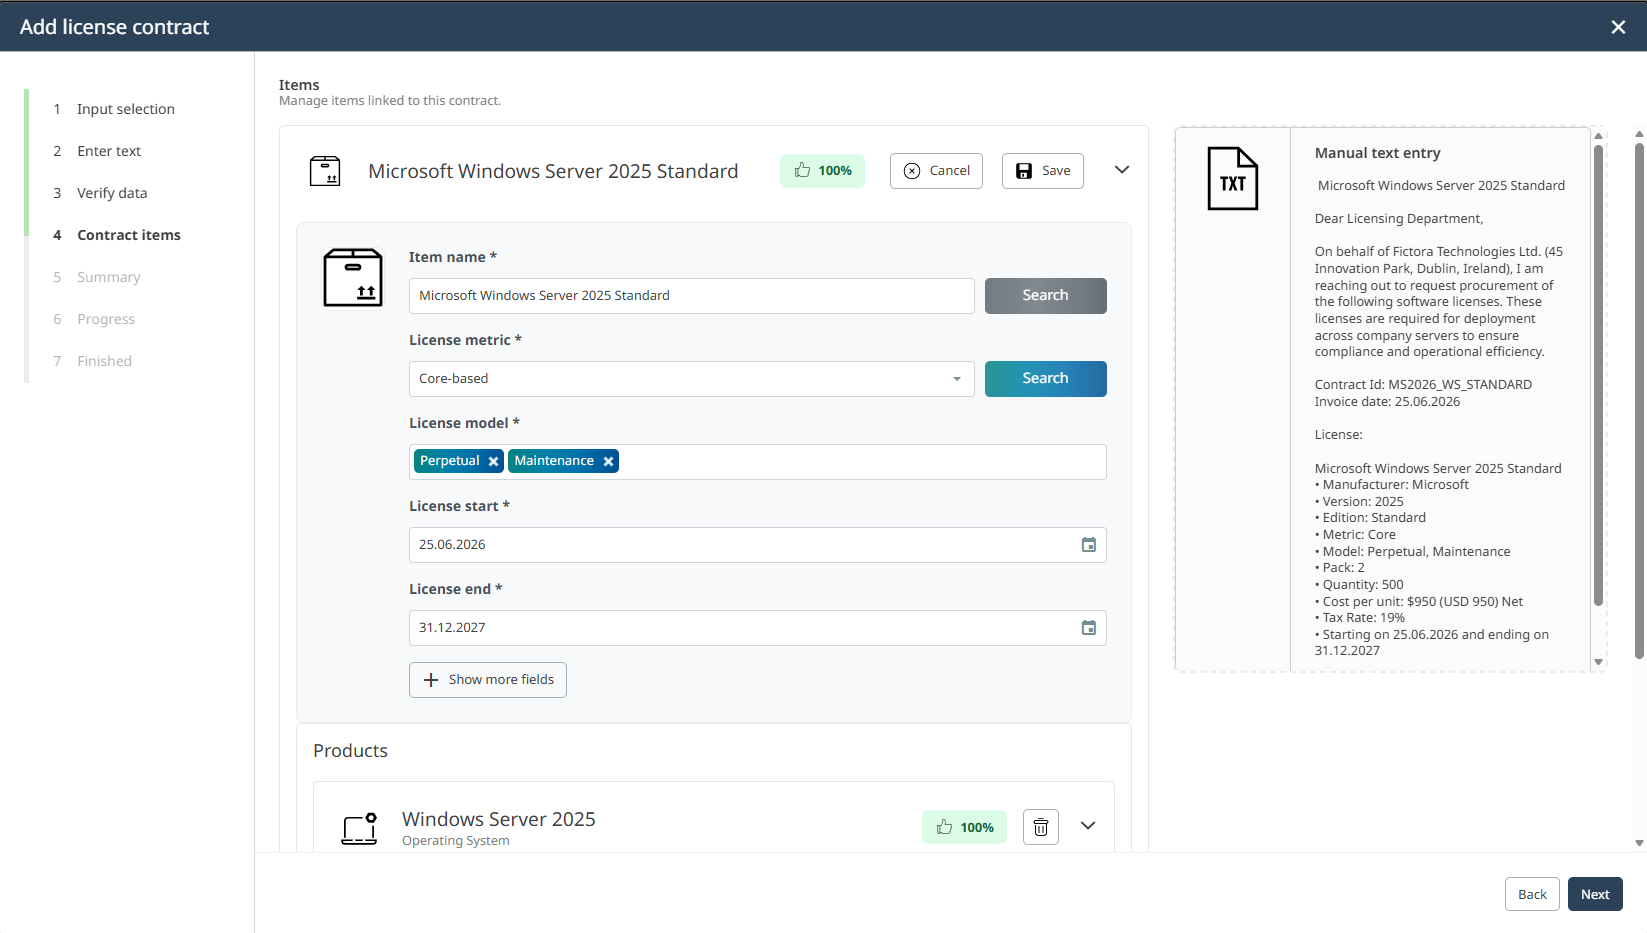
On the Contract items step, verify the extracted contract items and their catalog product matching. The extracted contract items are displayed in expandable sections. For each item, review the item name, license model, license metric, license pack, quantity, unit price, and coverage dates. SAM AI automatically matches each item to a product in the Technology Catalog. The confidence badge displayed for each item indicates the confidence of the product match. A high confidence indicates a reliable match; a low confidence means that the item should be reviewed manually.
|
Note: |
If required, inspect or correct the catalog product match before continuing. If an item has no catalog product matched, use the Search button to trigger a new catalog search. No item may be left in an unsaved edit state. The wizard blocks navigation until all items are saved and valid. When all items are verified, click Next.
Review the summary and create the contract on the Summary step. This step shows a read-only overview of the full contract, including the contract details, total costs, and one line per contract item. If the calculated total from the items does not match the total extracted from the invoice text, a warning icon is shown next to the total costs field. Verify the quantities and prices before proceeding. Click Create to save the contract and its generated entitlements.
Step 2: Review the generated entitlements
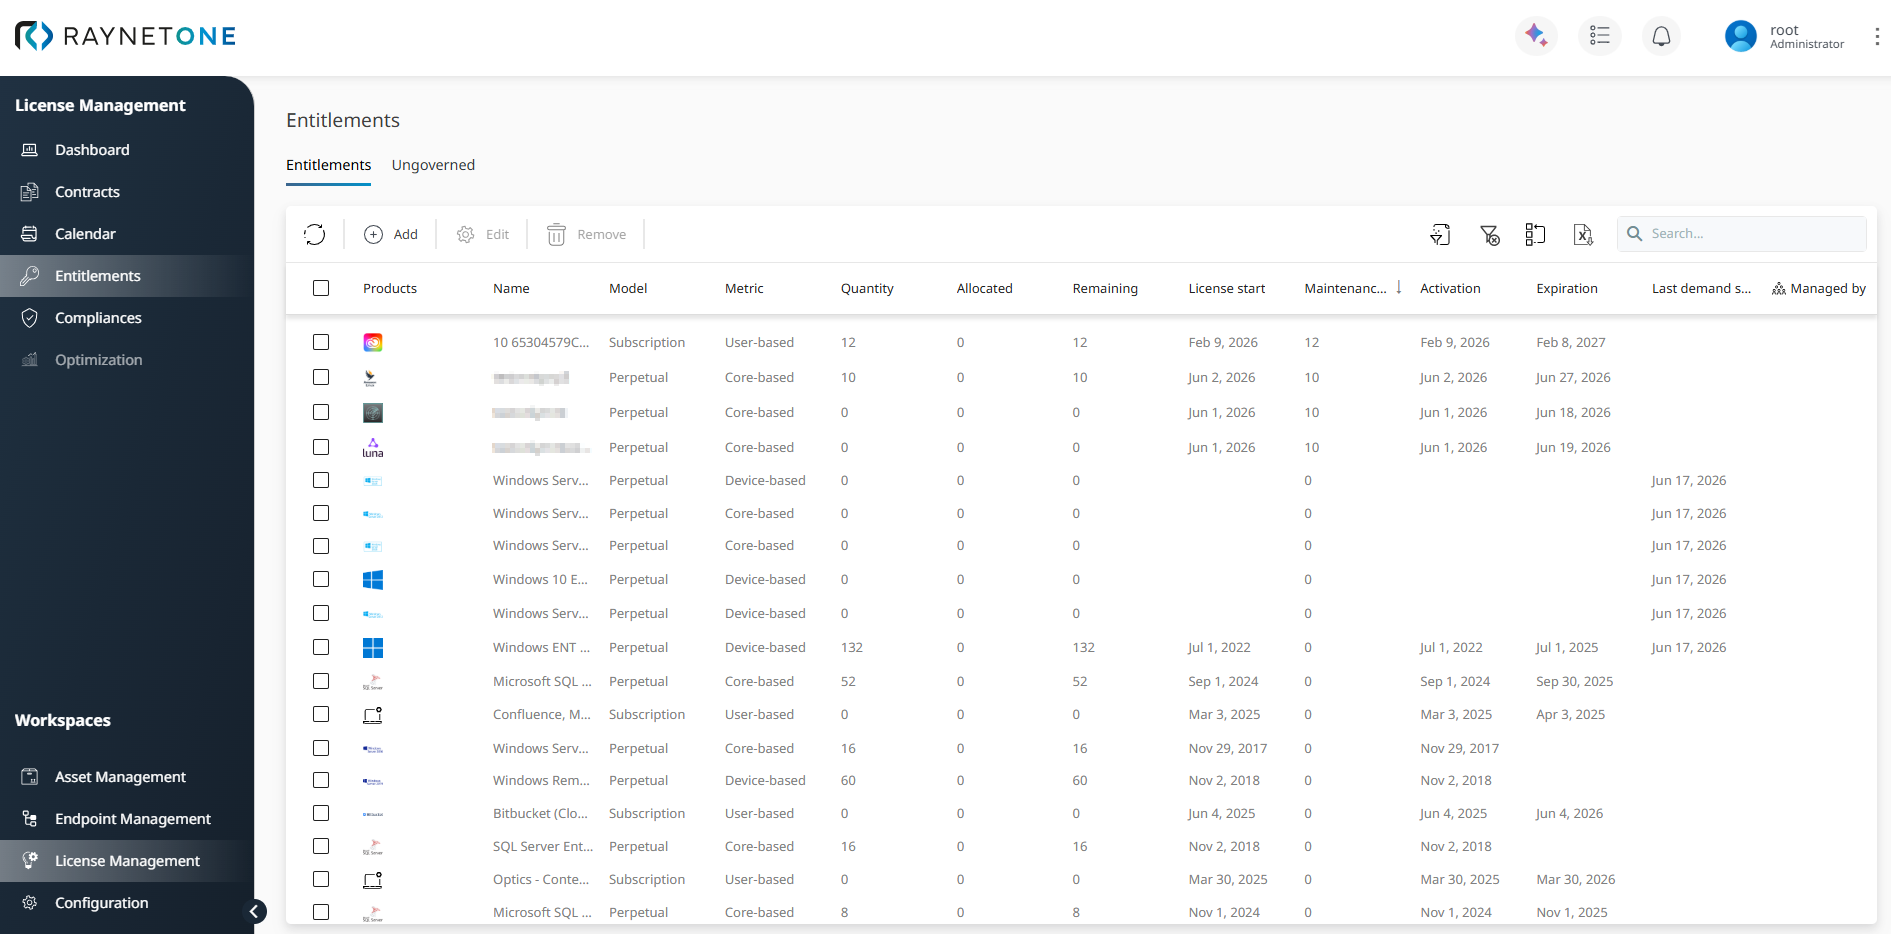
After saving, the contract appears in the Contracts list. Open the contract and switch to the Entitlements tab to review the entitlements generated from the contract item.
Each row in the list represents a licensed usage right derived from the contract. For the Windows Server 2025 Standard example, the entitlement uses the Perpetual license model and the Core-based metric. The quantity, maintenance quantity, activation date, and expiration date are derived from the contract item and its coverage dates.
 |
Best practice: |
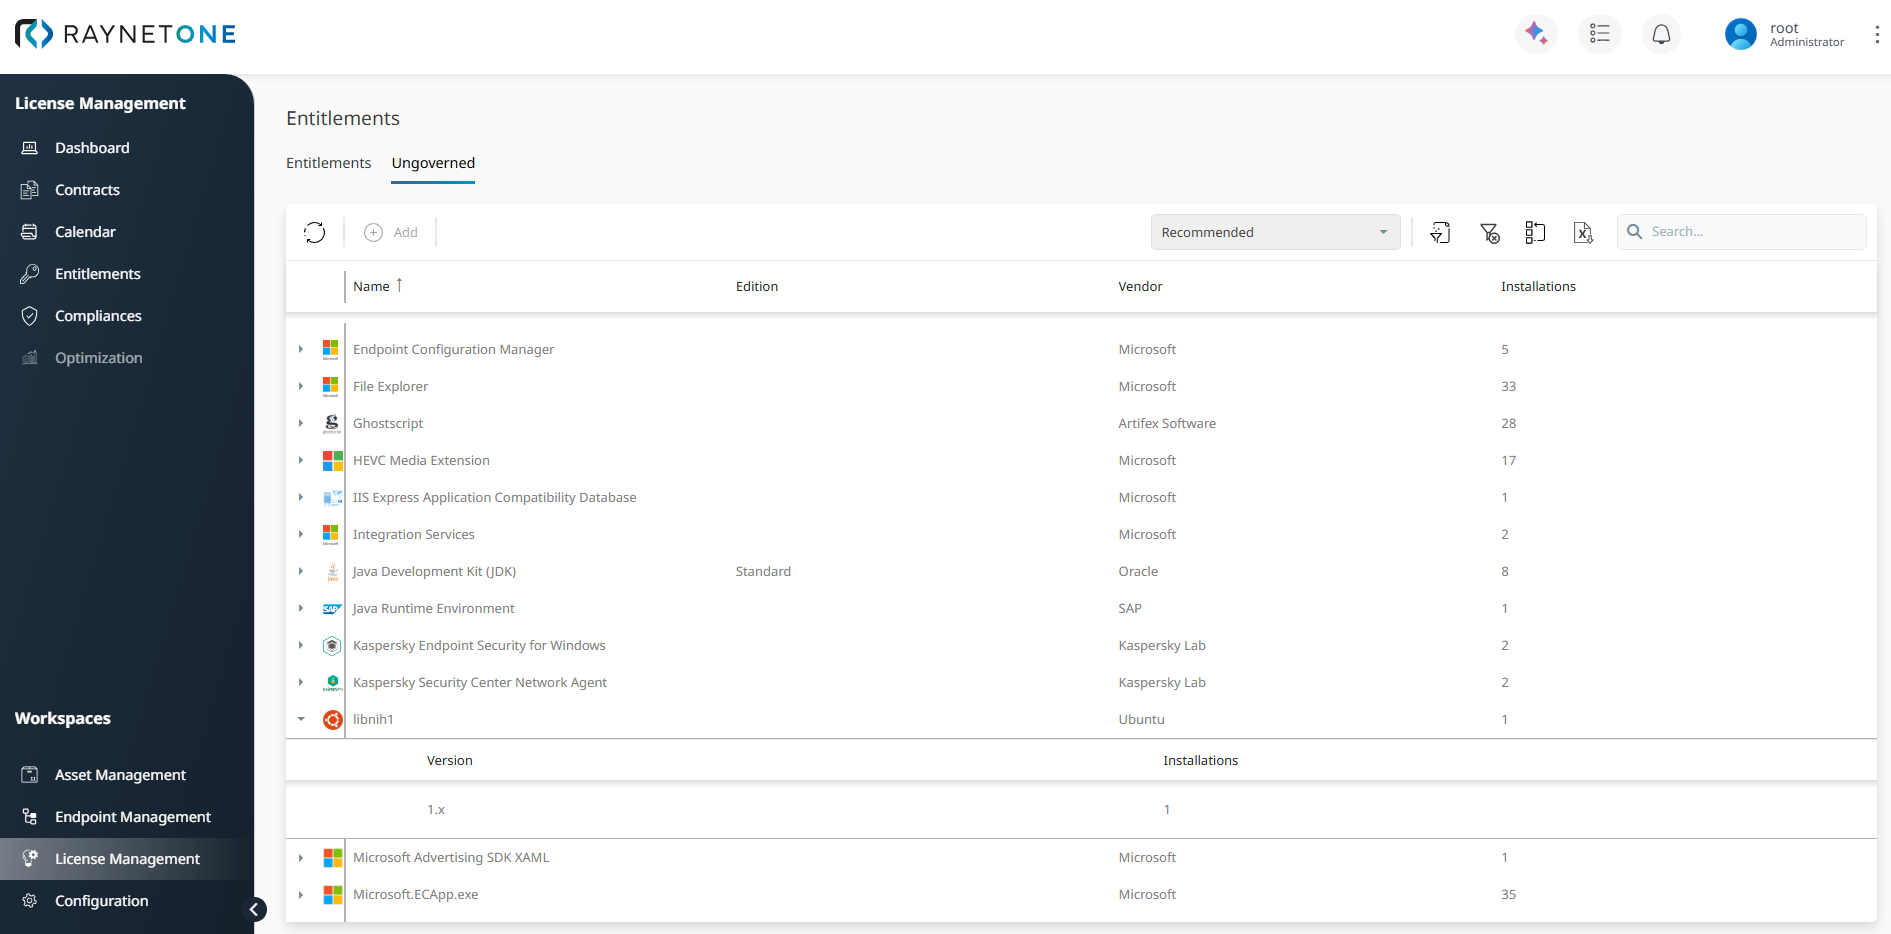
The Ungoverned tab shows discovered products that are present in the inventory but are not yet governed by a matching entitlement. Use this view to identify software that may require additional contract data, entitlement creation, or product matching.
Step 3: Check generated lifecycle events
License contracts and entitlements can create lifecycle events such as contract reviews, compliance checks, renewals, or maintenance reviews. These events help SAM teams track time-sensitive license activities.
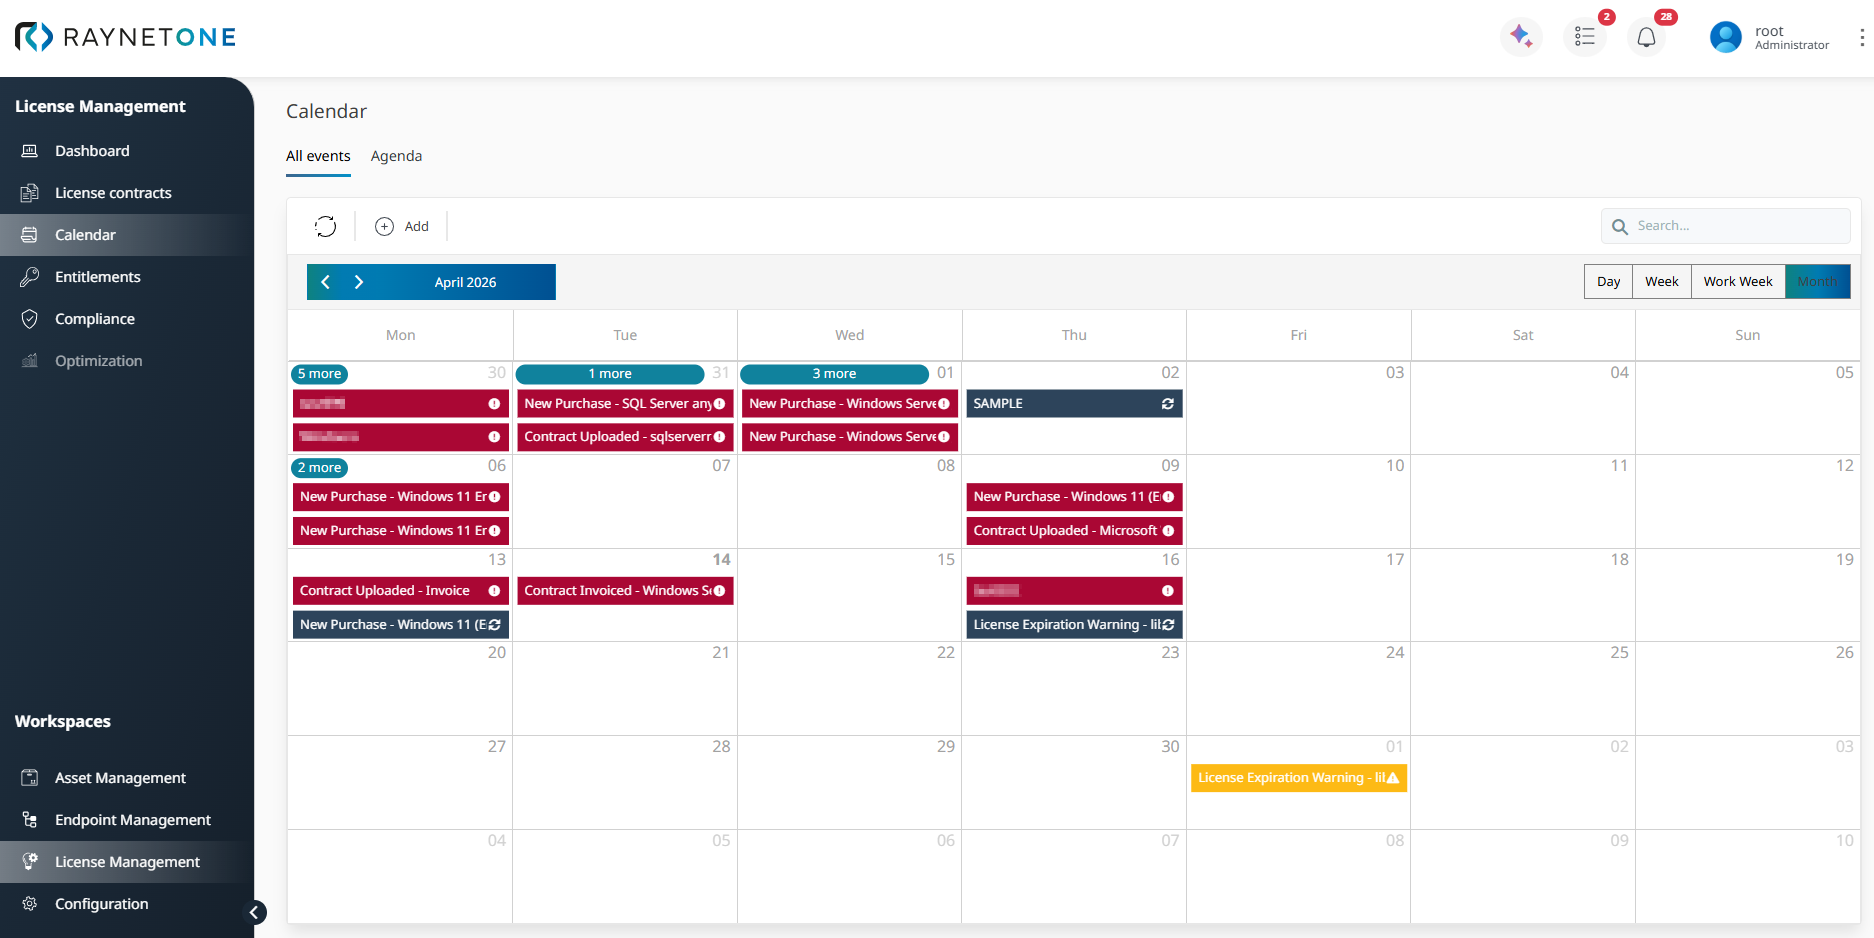
Open Workspaces > License Management > Calendar. The All events tab shows license-related events in a calendar layout. Use this view to identify upcoming contract, renewal, and maintenance-related events across the selected time period.
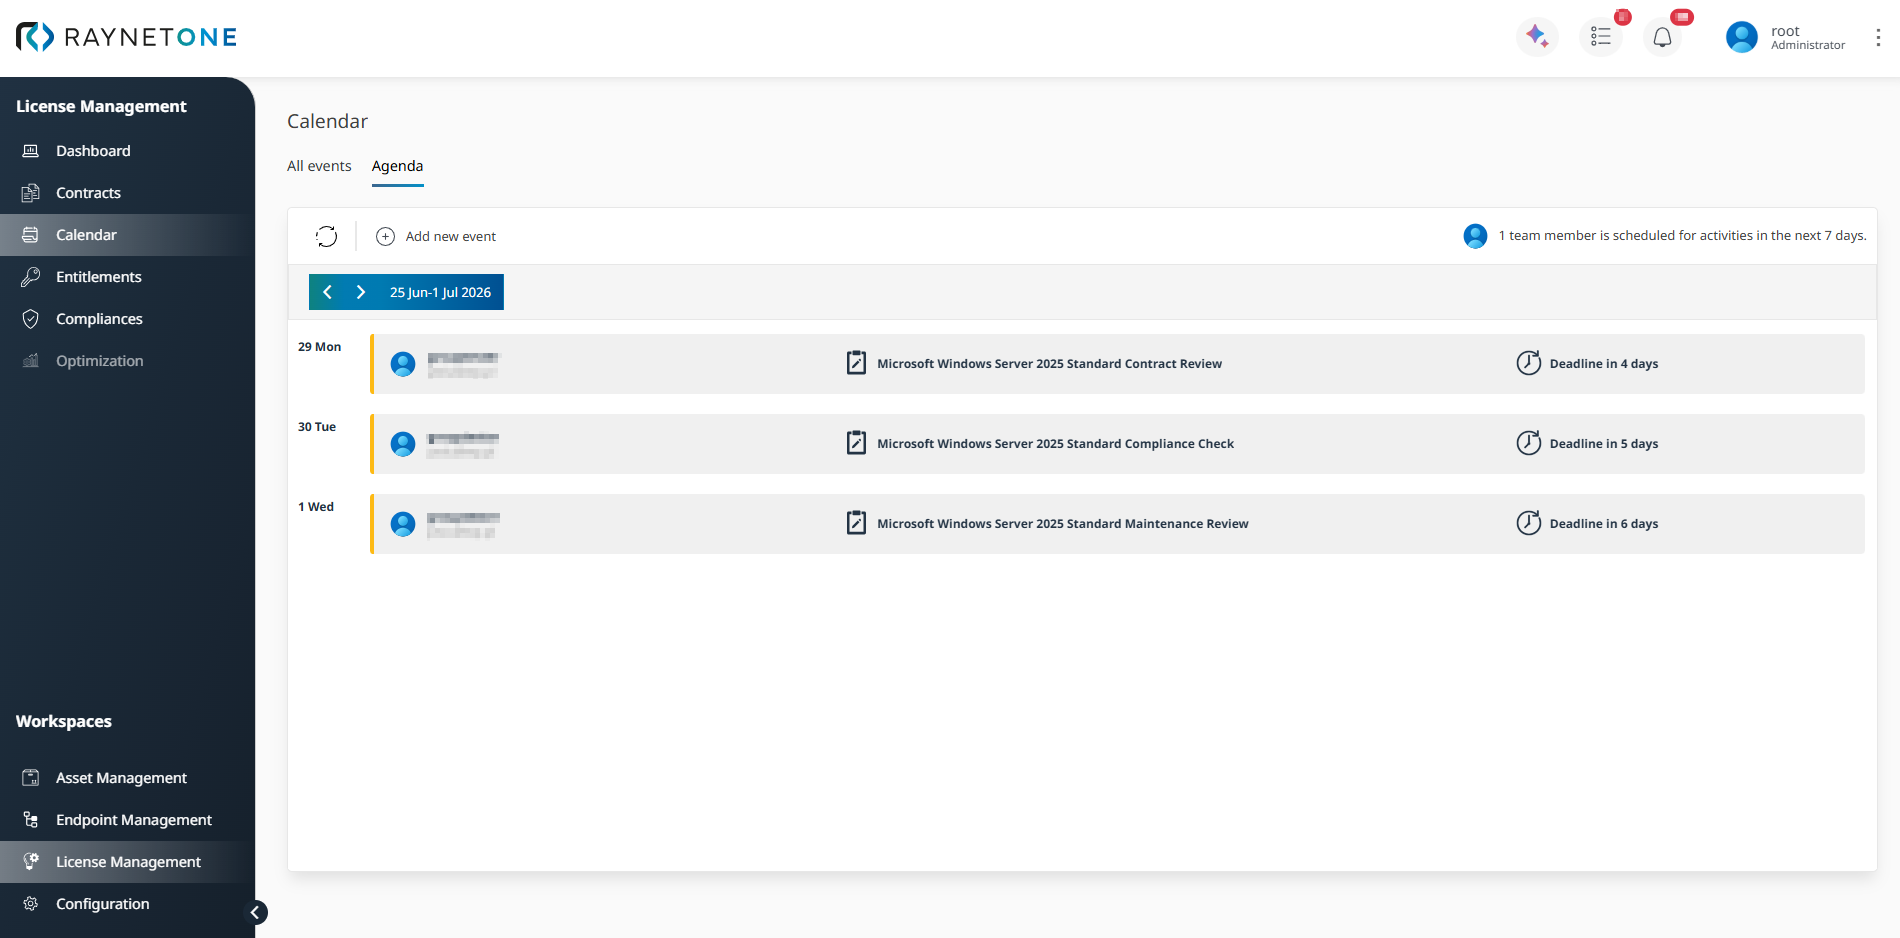
Switch to the Agenda tab to view your personalized activities in chronological order. In this example, the Agenda contains activities for Microsoft Windows Server 2025 Standard, such as contract review, compliance check, and maintenance review. For manually created events, select Notify specific user groups when the event is approaching on the Notifications step of the event wizard. The event is then shown in the Agenda of users who belong to the selected user groups.
Step 4: Understand how the platform calculates demand for your entitlement
With the entitlement in place, the platform determines how many licenses are actually required. This required quantity is called demand. Demand is calculated automatically from the discovered inventory data.
For a Core-based product such as Windows Server 2025 Standard, the platform identifies the relevant installations and evaluates the required number of cores from the discovered hardware inventory. The minimum core requirements and applicable licensing rules are provided by Codex, Raynet's built-in licensing knowledge service.
|
Note: |
The calculated demand is then used together with the available entitlement quantity to calculate the ELP.
Step 5: View the Effective License Position (ELP)
Navigate to Workspaces > License Management > Compliances. The Compliances overview shows a row for each product with active entitlements.
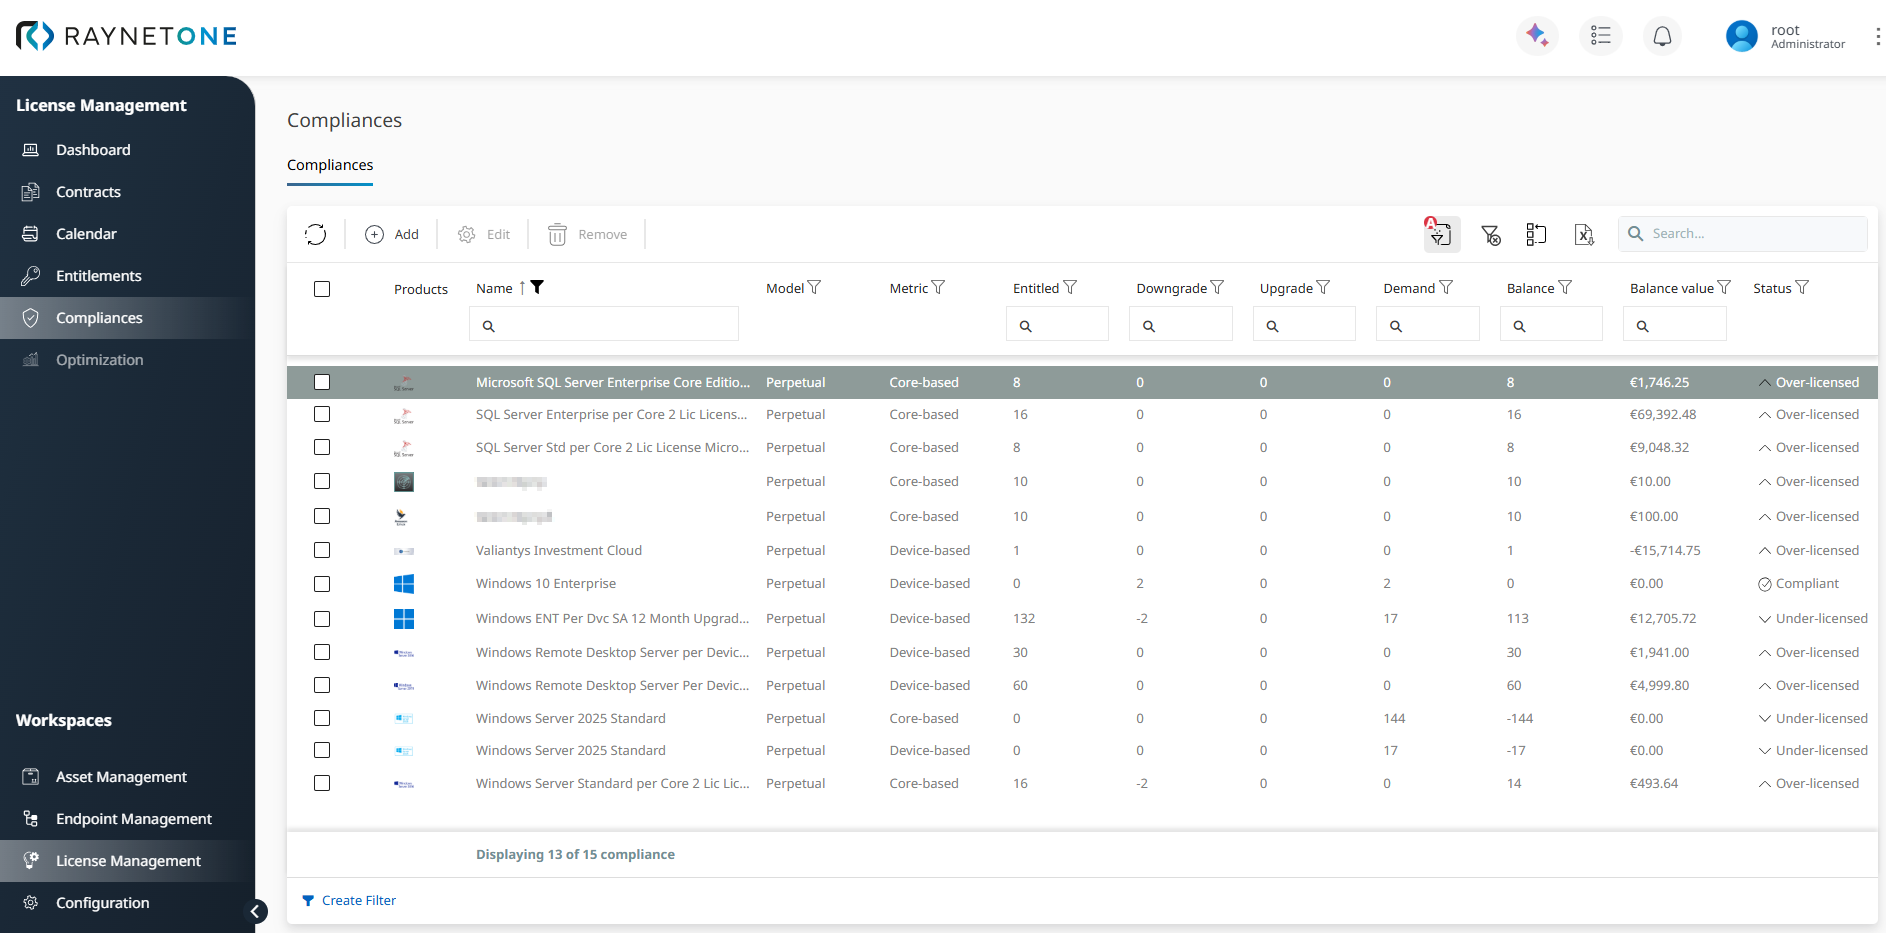
The Balance column is the ELP, calculated as:
Balance = Entitled + Downgrade + Upgrade − Demand
A positive balance means a license surplus. A negative balance means the product is under-licensed and represents an active compliance risk. A balance of zero means that the available entitlements exactly cover the calculated demand.
For supported products, downgrade or upgrade rights can affect the balance across product versions. In this example, part of the Windows Server 2025 Standard surplus is used to cover Windows Server 2022 Standard demand.
This provides your first calculated license position based on the available entitlements and the demand derived from your inventory data.