If you have a virtual infrastructure already managed in VMware vSphere, you can import its devices into Raynet One by using the Device import wizard. The scan connects to the VMware vSphere API endpoint, authenticates with the configured credentials, and imports device-related information based on the selected scan scope.
To import devices from VMware vSphere, you need to specify the following:
•the VMware vSphere instance in your network
•network credentials capable of performing the queries
•the runner which can reach the VMware vSphere endpoint
If you have yet to configure the runner for the job, please do so beforehand. All remaining parameters can be configured as explained in this chapter.
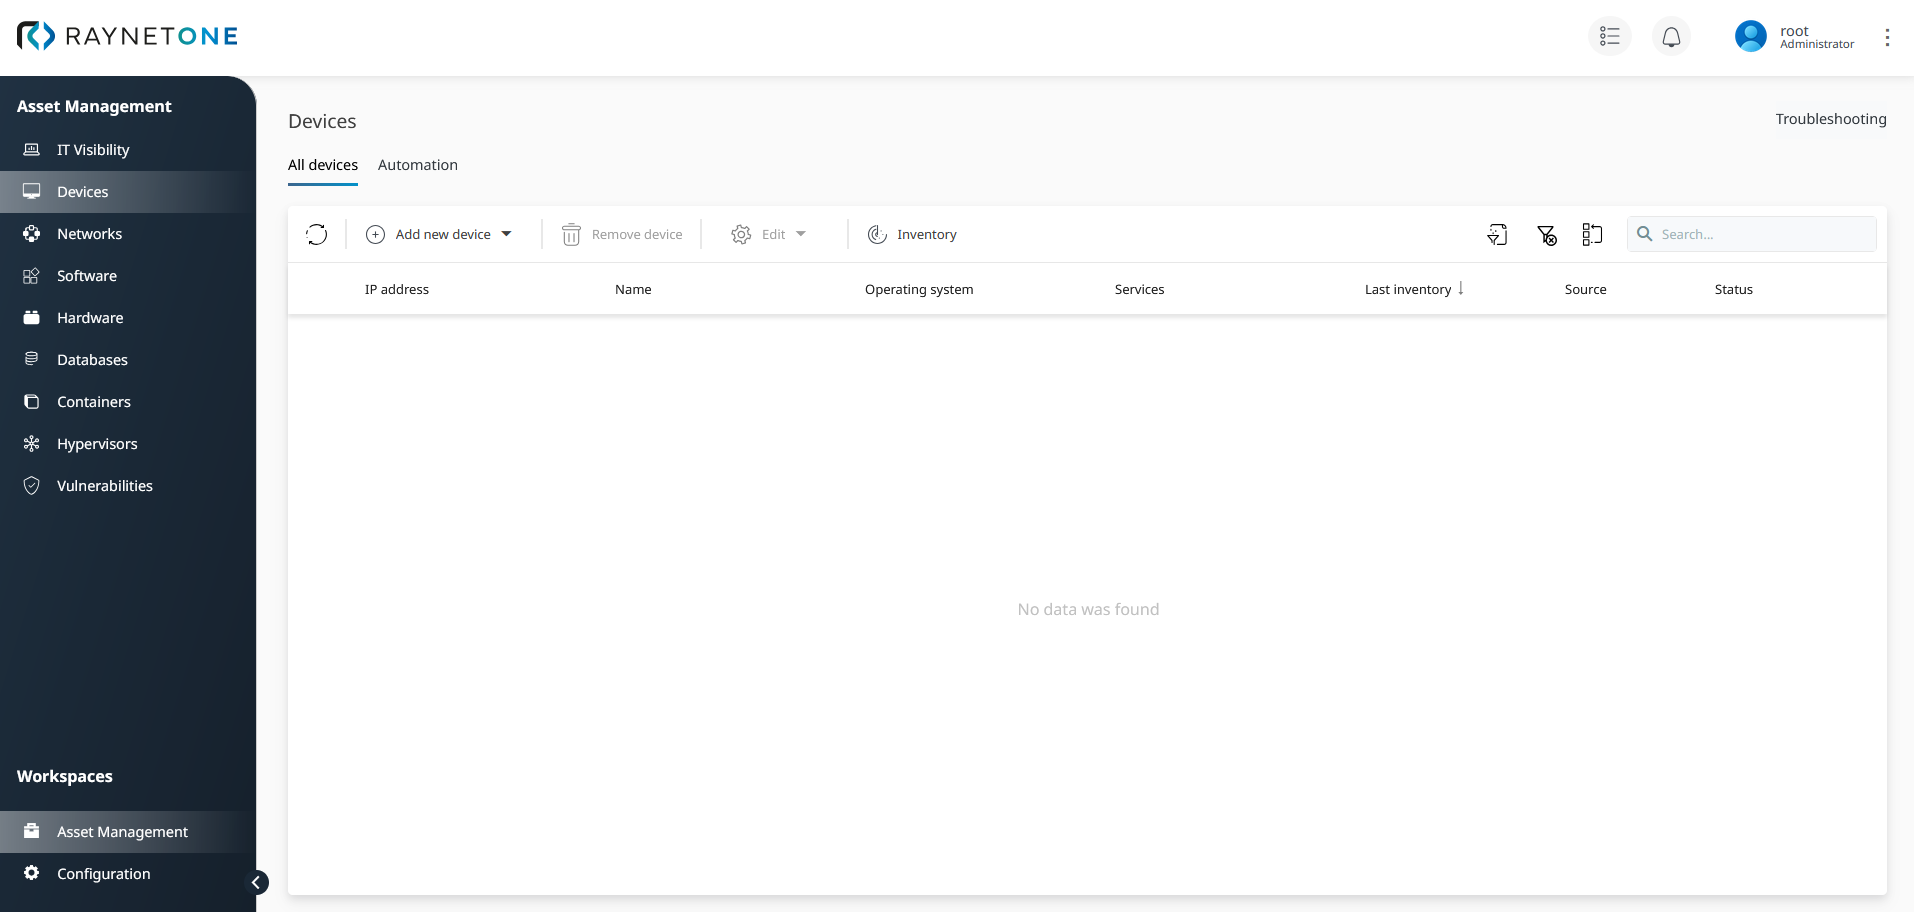
1.Navigate to Devices in the Asset Management workspace. You are presented with the list of all devices of your IT landscape.
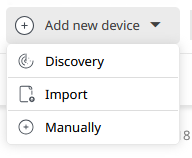
2.Click on the Add a new device button. A new drop-down list populated with device addition options appears. Click on the Import option.
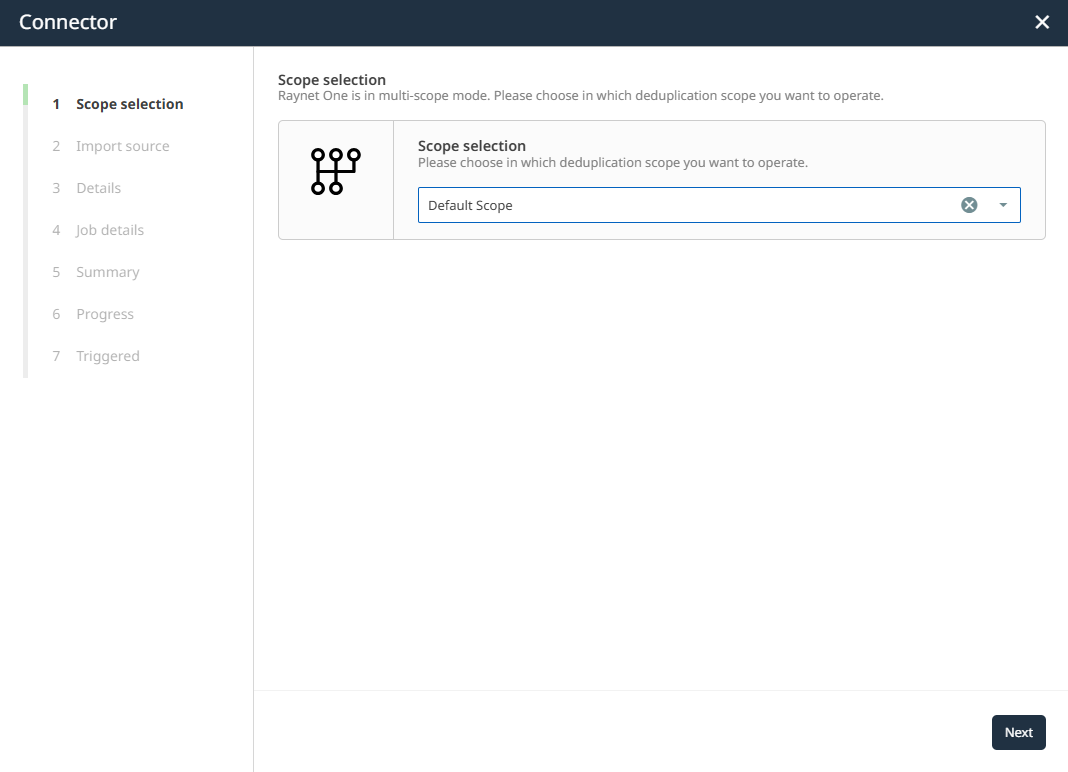
3.A new sub-window titled Scope Selection appears. Choose your desired scope and click Next.
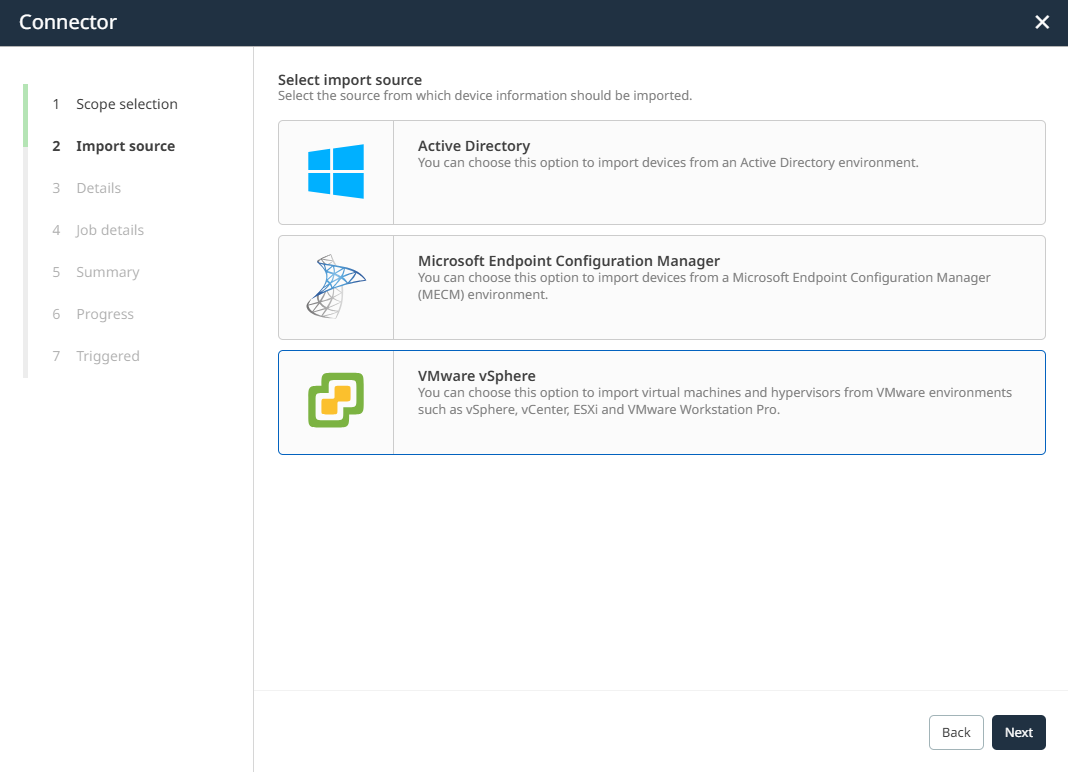
4.In the next step, Import source section appears. Choose the VMware vSphere option and click on Next.
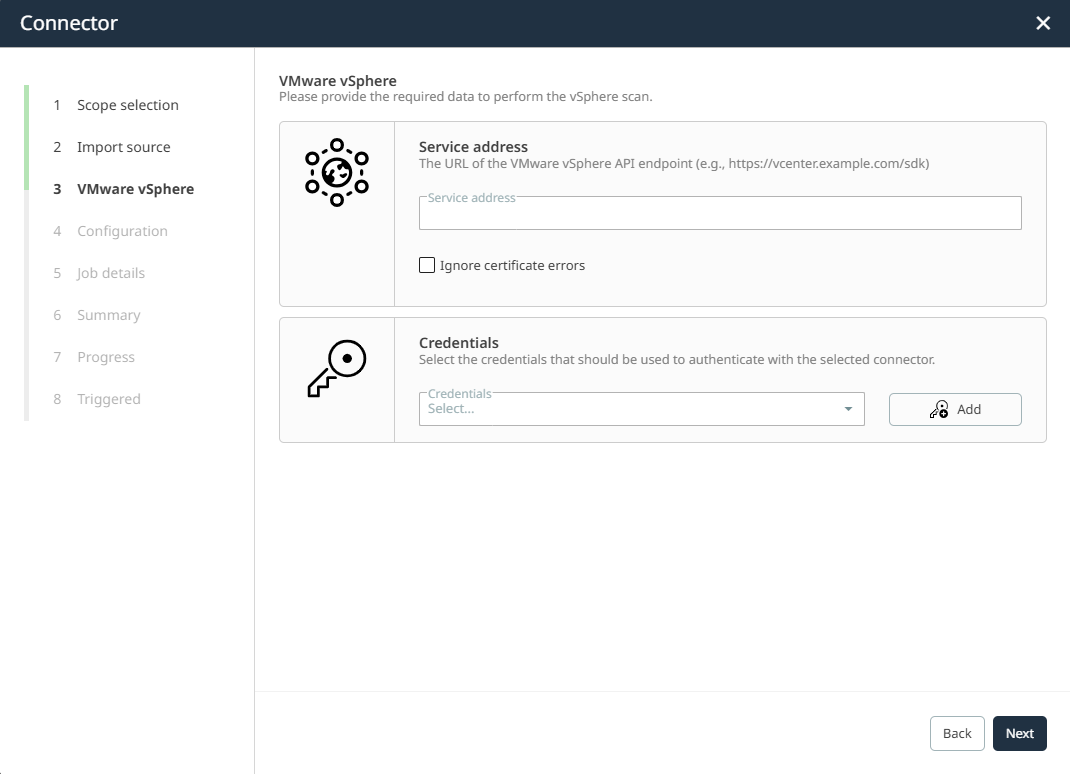
5.In this step, provide the connection settings required for the VMware vSphere scan.
In the Service address field, enter the URL of the VMware vSphere API endpoint, for example https://vcenter.example.com/sdk.
If required, you can enable Ignore certificate errors. This option allows the connection to proceed even if certificate validation fails, for example when self-signed or otherwise untrusted certificates are used.
In the Credentials section, select the credentials that should be used to authenticate with the selected connector. You can choose an existing credential set from the list or click Add to create a new one.
|
Note: |
After providing the required details, click on Next.
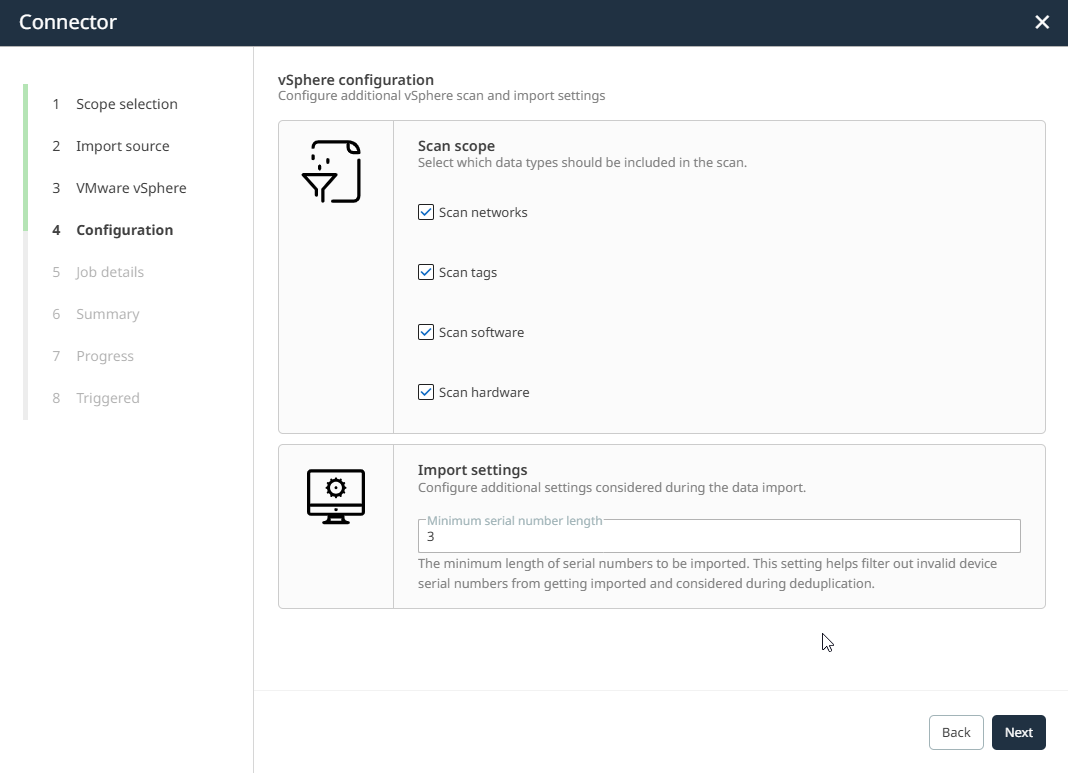
6.In the Configuration step, define which types of data should be included in the scan.
Under Scan scope, you can choose whether the job should include:
•Scan networks
•Scan tags
•Scan software
•Scan hardware
Select the options according to the information you want to import.
In the Import settings section, you can configure additional settings considered during the data import. The field Minimum serial number length specifies the minimum length a serial number must have in order to be considered during import.
After configuring the scan scope and import settings, click on Next.
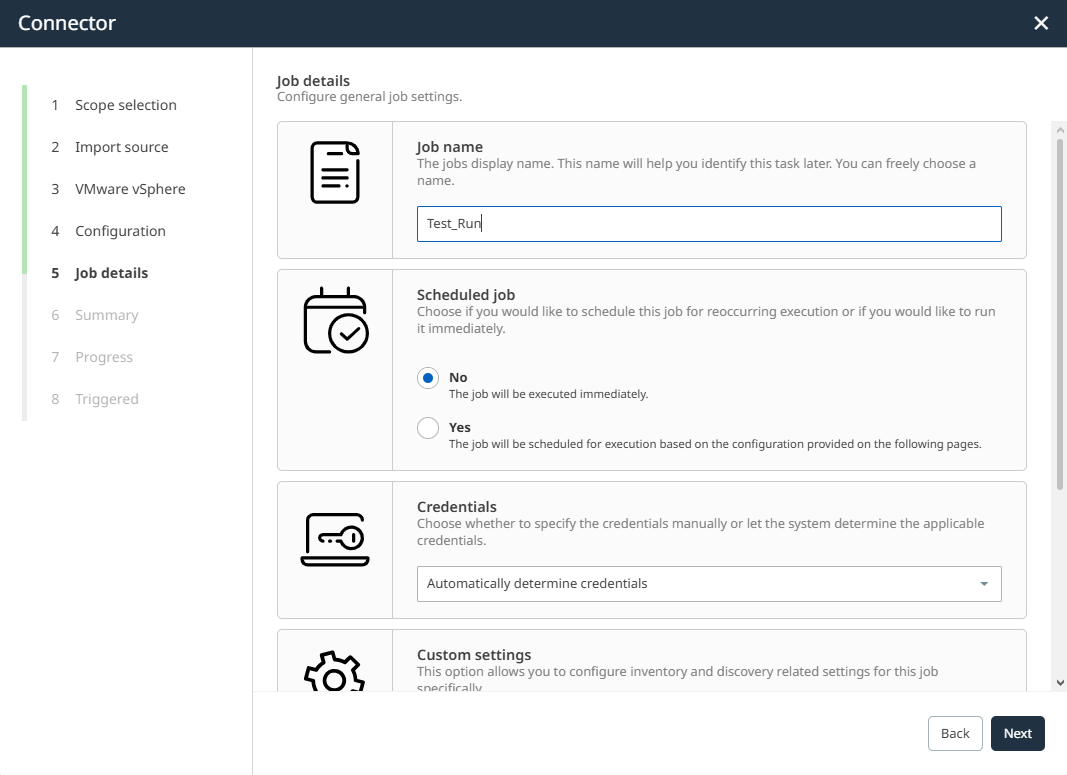
7.In the Job details step, configure the general job settings.
In the Job name field, enter a meaningful name for the job. This name helps you identify the task later.
In the Scheduled job section, choose whether the job should be executed immediately or scheduled for recurring execution. For a one-time import, leave No selected.
In the Credentials section, choose whether the system should Automatically determine credentials or whether credentials should be defined manually.
In the Custom settings section, choose whether the job should use the general configuration or custom job-specific settings. If Off is selected, the applied settings will be calculated based on the general configuration. If On is selected, custom settings can be specified for this specific job on the following pages.
In the Preferred runner section, select the runner that should be used during execution, or leave the automatic determination in place if appropriate. The selected runner must be able to reach the VMware vSphere endpoint.
After configuring the job details, click on Next.
On the Summary page, review all relevant details of your requested import operation, including the connector, job name, credential handling, and execution type.
Go back if you need to revise the configuration. Otherwise, click on Start job to start the VMware vSphere import job.

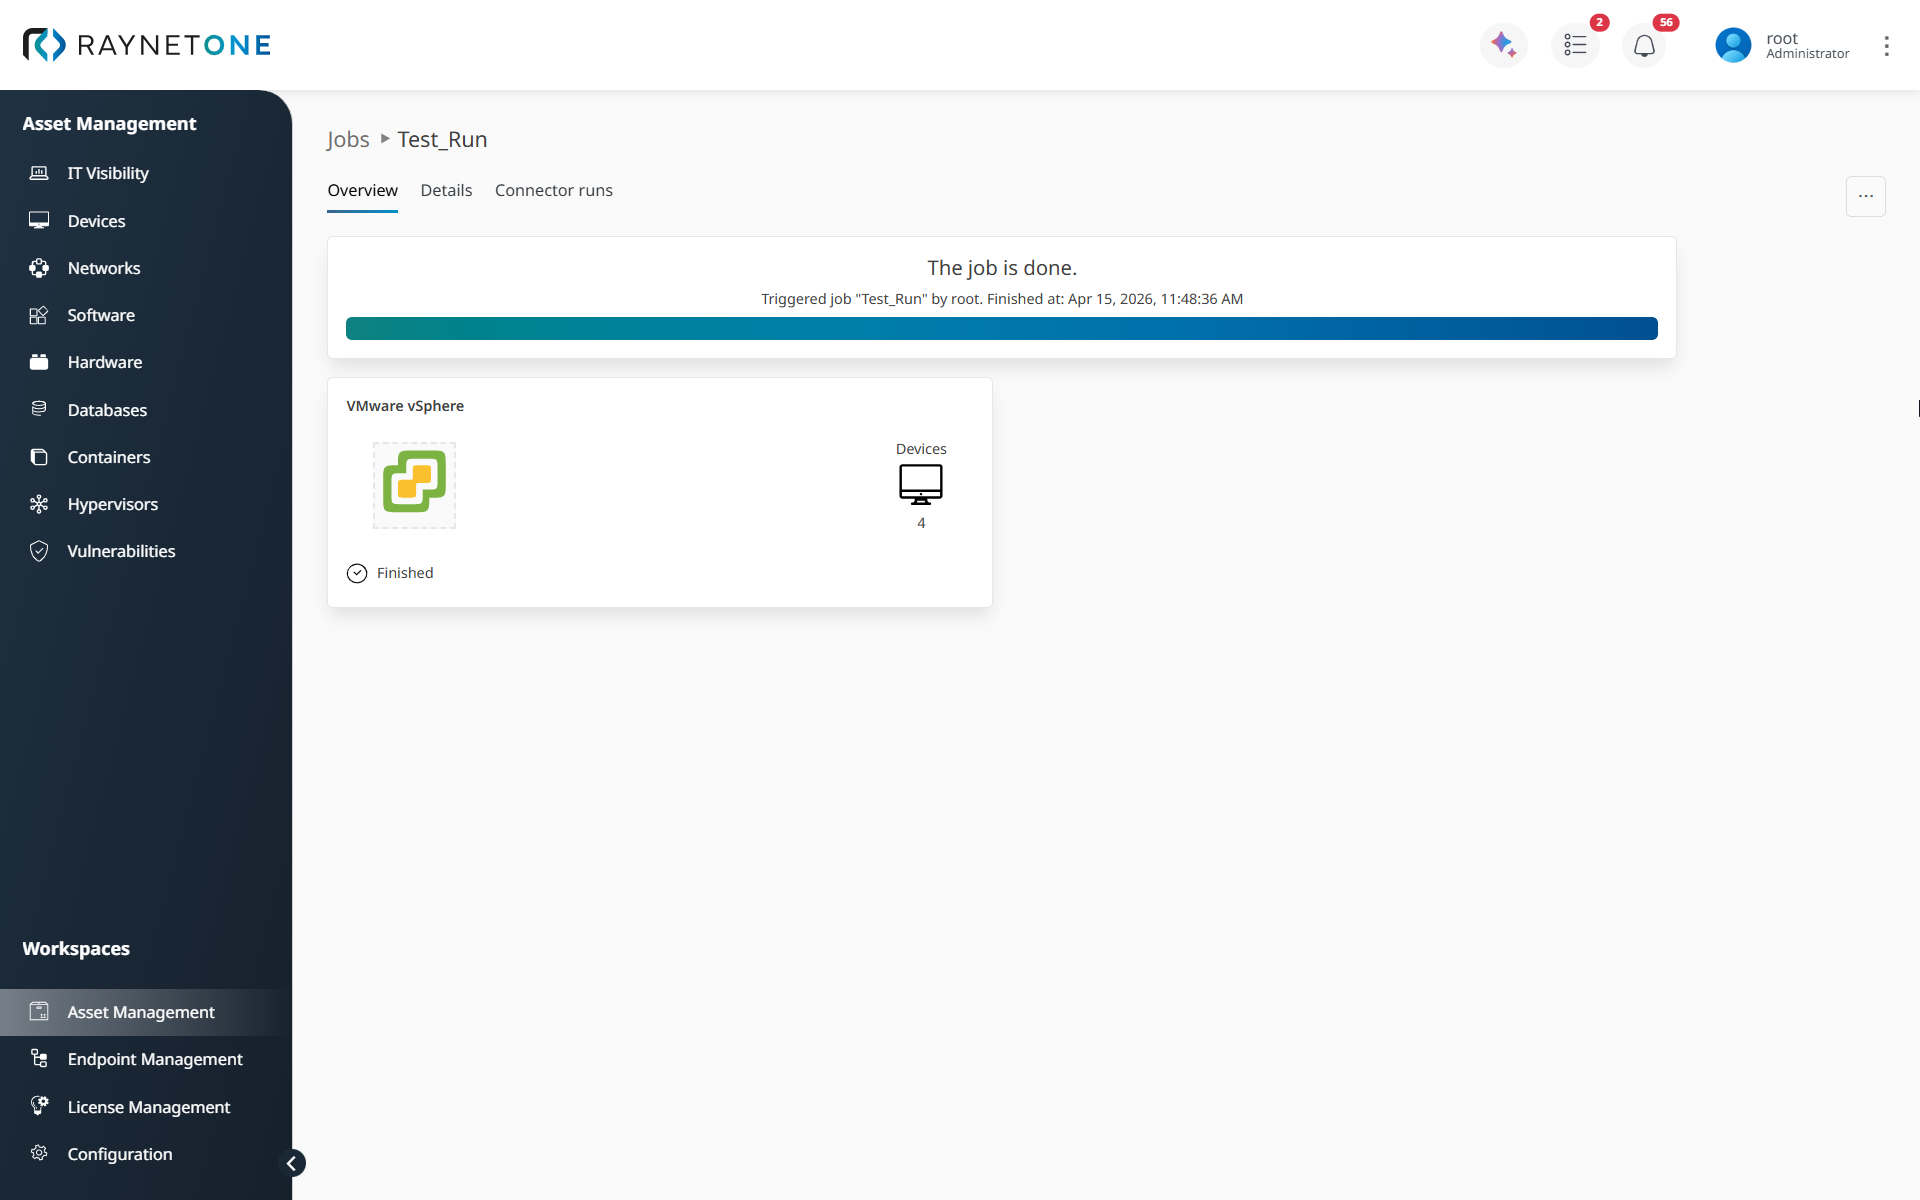
8.Wait for the job to start. After triggering the job, the wizard displays the processing status in the Triggered step.
You can observe the progress directly in this view. The page shows the running connector job and initial status information. To inspect the execution in more detail, click on Open details.
Once the scan has finished successfully, the imported devices will become available in the device inventory.