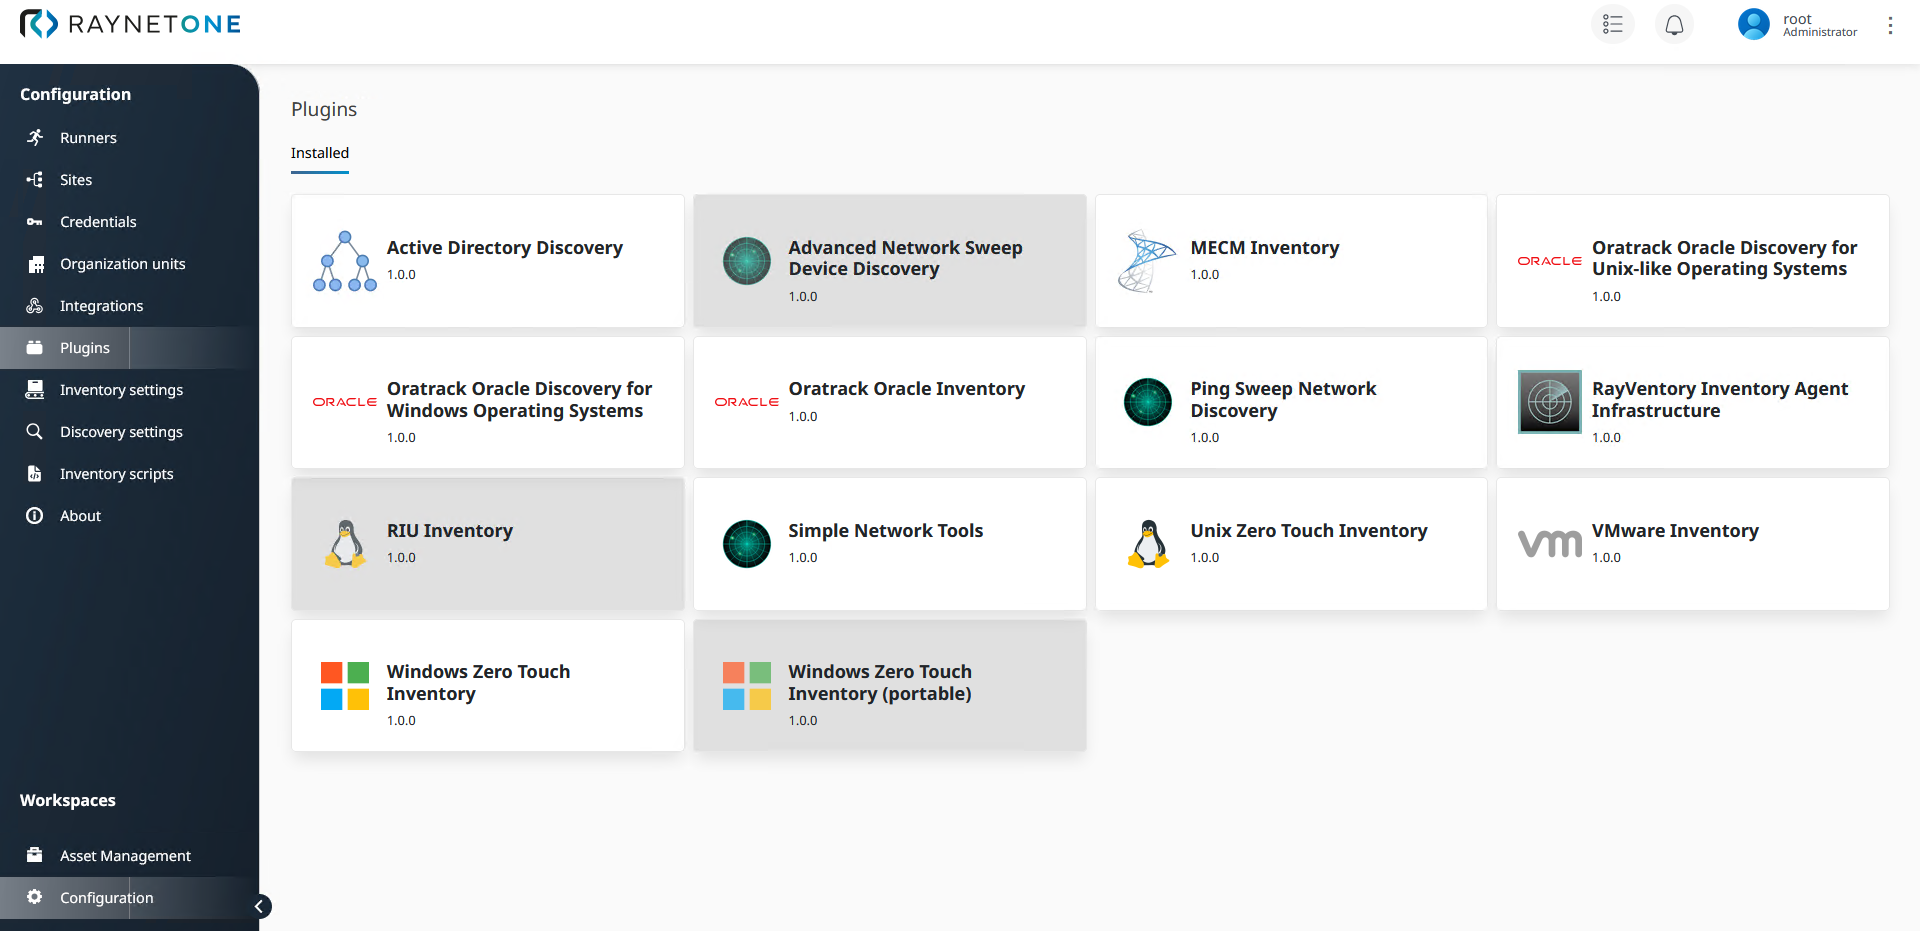
Raynet One comes with a number of plugins as core functional elements. In order to become familiar with them, you can inspect their properties in the Details view.
The following step-by-step guide is about the Windows Zero Touch Inventory plugin and how to inspect it. Learn the basics to be able to inspect any of the plugins thoroughly.
1.Navigate to the Configuration workspace. Then, click on Plugins to open the view. It is located in the Sidebar menu. Next, left-click on the plugin entry labeled Windows Zero Touch Inventory to open its Details view.
2.The Details page of the Windows Zero Touch Inventory plugin page is opened. First, take a look at the general Plugin specifications section. Every details view has got such a section to describe the main properties of the inspected object. As a part of this section, you can enable and disable the plugin by clicking on the button labeled Enabled/Disabled.
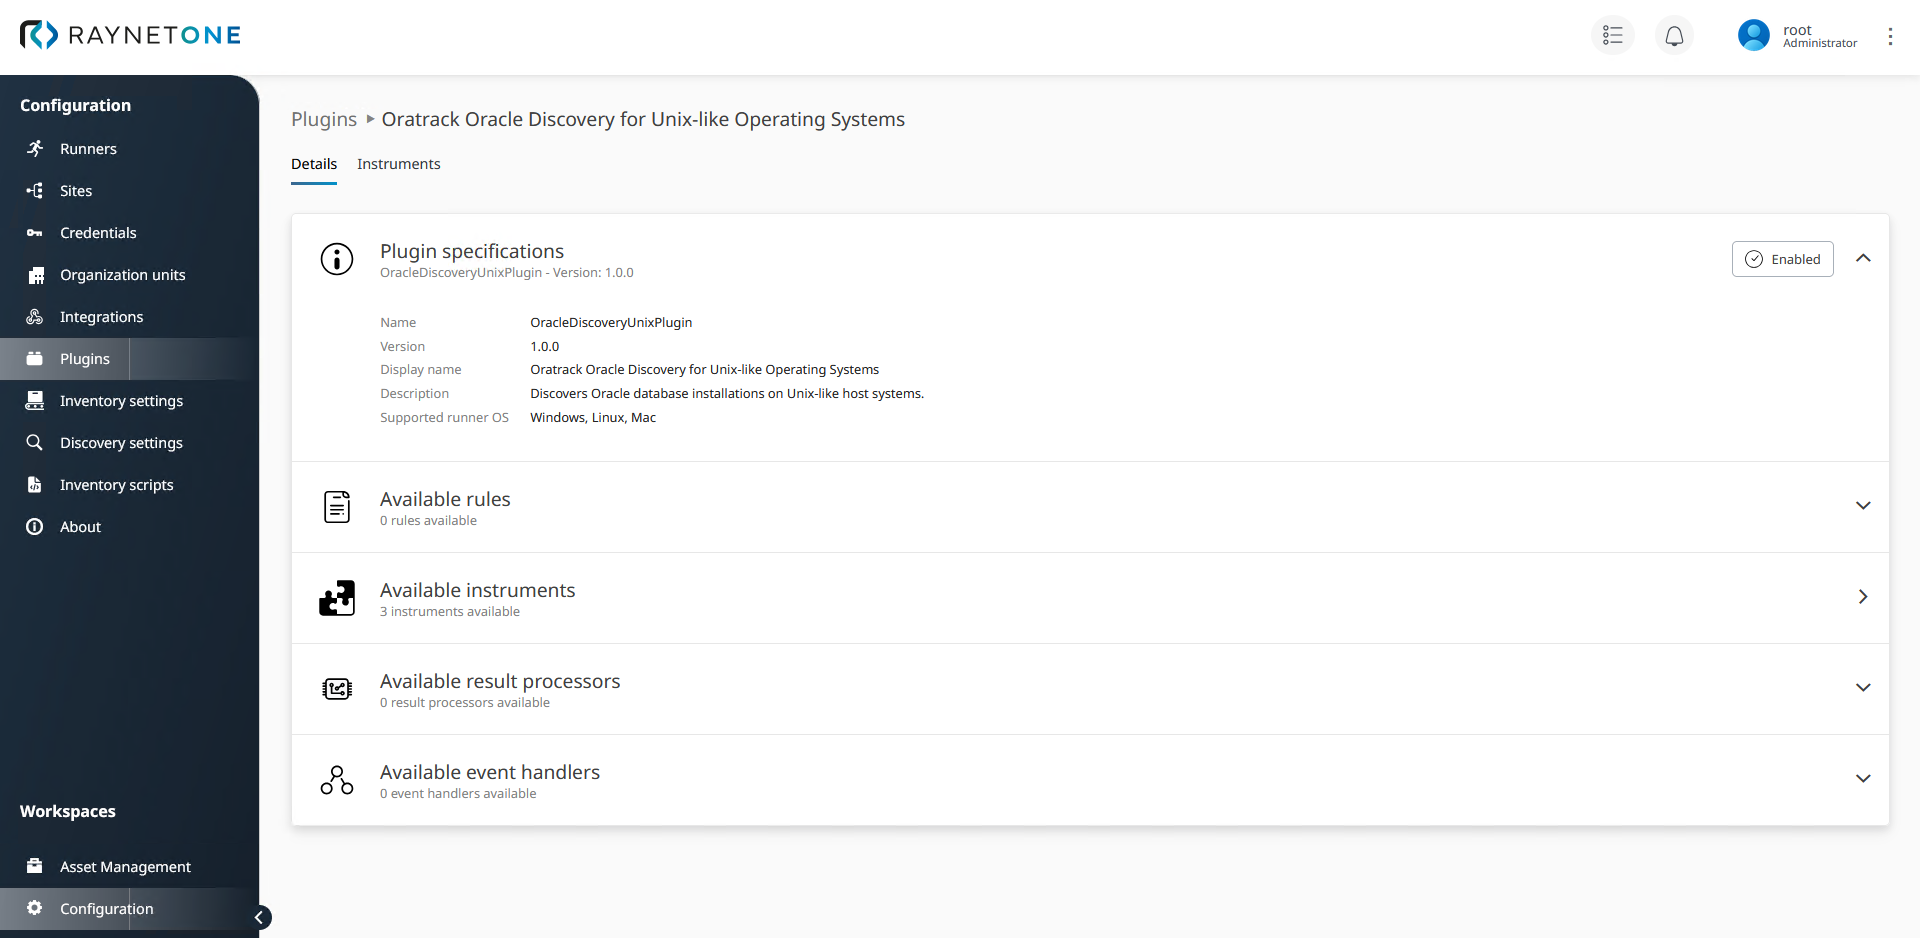
Plugins details view of the Windows Zero Touch Inventory plugin. The highlighted section is the main section. It contains information helpful to management and troubleshooting.
![]()
![]()
The left button is displayed for an enabled plugin, the right one for a disabled. By clicking on the button, it changes its look to the other one, indicating plugin state change.
3.The remaining sections below describe the technological content of the plugin. A plugin is just a versioned container. These objects are actually used during platform operation. Three of these sections, namely Available rules, Available instruments and Available event handlers, can be expanded. Left-click on the sections down-facing arrows to expand them.
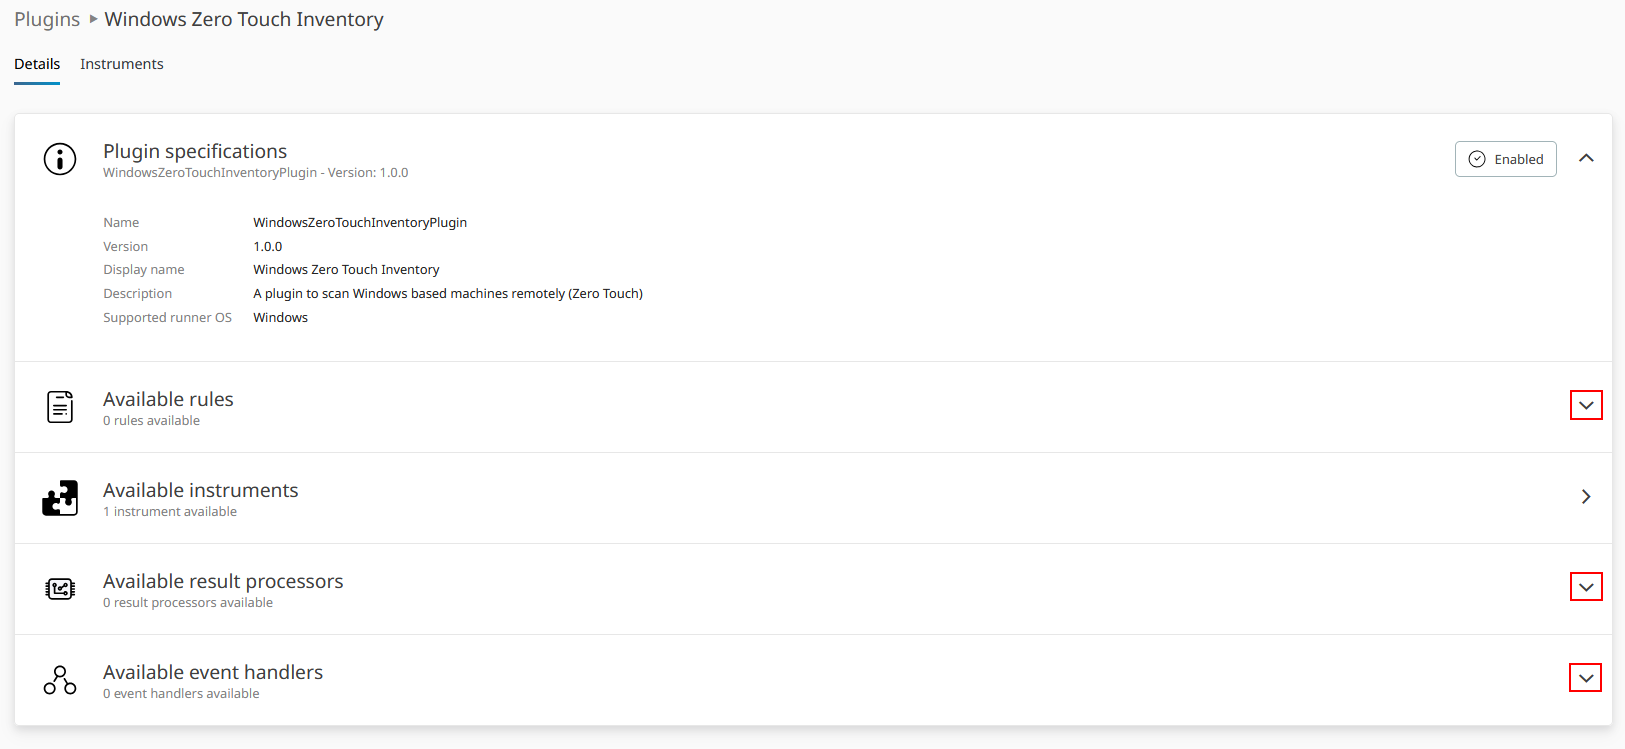
Left-click on the indicated UI elements for expansion.

Consequently, describing content is shown relating to the sections's title. In this case, the content indicates an empty list, just like the section's title hints at. In case of plugin content evidence, remember to expand the necessary sections to learn more about the contained objects.
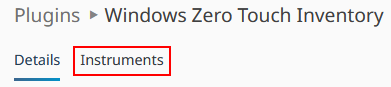
4.Click on the Instruments tab to switch to the page of the most important plugin object type, the instrument.
5.On this page, all instruments of the Windows Zero Touch Inventory plugin are listed. Instruments are powerful scanning technology, providing meaningful description and, optionally, configurable settings. First things first, click on the bottom-facing arrow inside of the sole instrument's section to expand it.

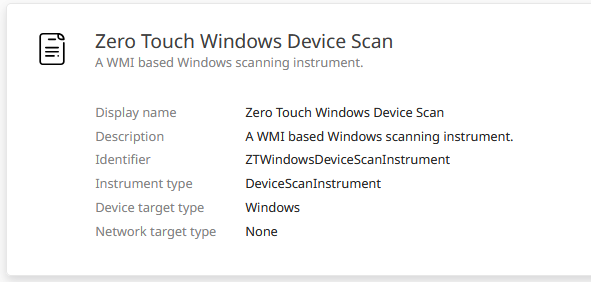
6.Take a look at the instrument description. It shows a set of parameters assigned to the instrument. Let's examine them.
The Display name is used whenever this plugin is mentioned on the web interface in a human-friendly way. It should be distinct across the entire set of instruments and plugins.
The Description contains helpful text to explain the instrument's purpose quickly. It is written by the plugin developers and, thus, targets technical people. Should be taken with a grain of salt. It is not meant to be complete but give you the general idea.
The Identifier is the technical name. It is used to distinctly specify the instrument for platform jobs. Users of the REST API should look up this parameter and provide it in requests to the platform server.
The other parameters explain technical classifications and restrictions about instrument use. As you become more familiar with the platform, you will learn their meaning.
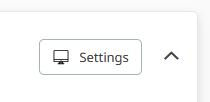
7.Moving on, click on the Settings button to the right inside of the instrument section.
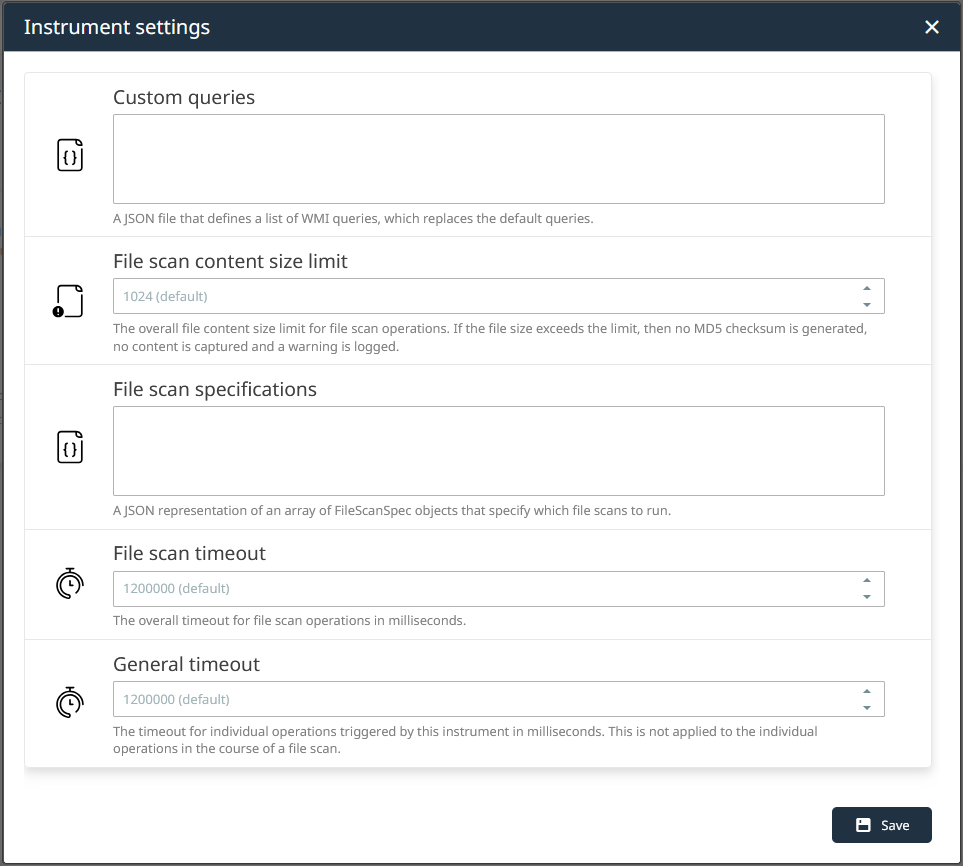
8.The Instrument settings form sub-window is opened. This particular plugin has got powerful configuration options. You can specify file scan specifications to collect device file inventory. Custom queries are used as parameter to WMI requests. There are parameters for error handling and restriction. You should be familiar with the instrument's logic to be able to configure these parameters properly. Click on the X in the top right of the sub-window to close it.
This chapter has taught you all there is to plugin inspection. Some of the steps have elaborated highly technical plugin components. Advanced platform users need to inspect and configure them to get the most out of Raynet One. In the next chapter, we want to make changes to the configuration of a simple plugin.