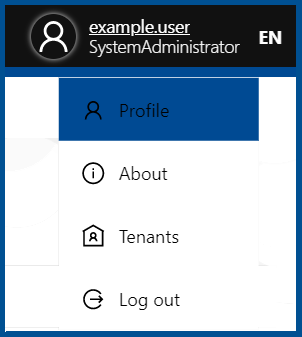
In order to create an API key it is necessary to select the Profile option from the context menu that is shown when hovering over the user name shown at the top right of the screen. It is necessary to be logged in with the same account that should be used with the software for which the API key is needed.

The My Profile page will open. This page contains a tab which is called API Keys. The tab contains a list of the API keys that already exist for the user. It can be used to either delete an already existing key or to add a new key.
|
Be aware: The key itself will only be shown when created. If a key has been lost, it cannot be retrieved. Delete the entry for the old key and create a new key. |
In order to delete a key, select the key and click on Delete. It is necessary to confirm the deletion once more in the confirmation dialog. To add a new API Key, click on Add.

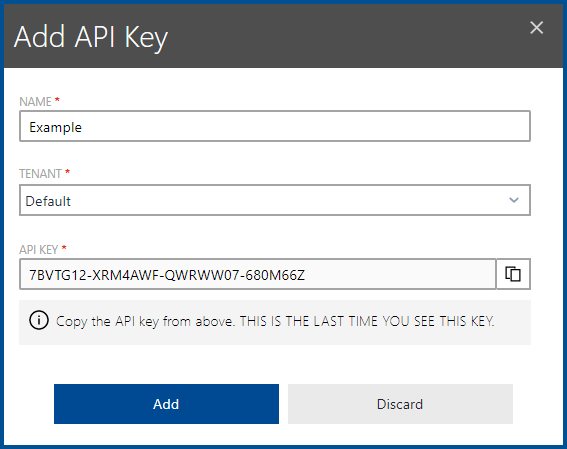
When clicking on Add the Add API Key dialog will be opened.

The following fields are available in this dialog:
•NAME: Enter a name for the API key. For example, the name of the application for which the API key will be used.
•TENANT: Select the tenant for which the API key will be used. It is only possible to select one of the the available tenants for each key. In order to use API keys with multiple tenants, it is necessary to create multiple keys.
•API KEY: This field contains the automatically generated API key. After the dialog has been closed it will not be possible to retrieve the key. Use the button at the end of the field in order to copy the key to the clipboard.
After all fields have been filled and after copying the API key click on the Add button in order to finalize the creation of the key. It is now possible to use the key to create a connection to the selected tenant.