This chapter of the document is meant to help users upgrade from their existing RayFlow version to RayFlow 8.0.
Migration from 1.x RayFlow Servers
If migrating from a 1.x RayFlow server to RayFlow 8.0, it is recommended to ask for the help of our consultants.
Migration from 2.x RayFlow Servers or Higher to 8.0
1. Make a Backup the Current System
(This step is optional but strongly recommended)
A.Backup the SQL database:
•Start the SQL Server Management Studio.
•Right-click on the existing RayFlow database and select Task > Back Up from the context menu.
A.Backup the file system:
•Go to the RayFlow Server Installation directory (%INSTALLDIR%).
•Right-click on the directory and select Send To > Compressed Zip Folder.
•Store the database and the file backups at a safe location.
|
Note: The content of the previous related web.config file will later be needed for the edition of the new web.config file. |
2.Uninstall the Previous RayFlow Server
|
Warning: If step 1 has been skipped, make sure that the web.config file of the previous installation is kept available in a safe location. |
After the old web.config file has been saved uninstall the old version of RayFlow Server.
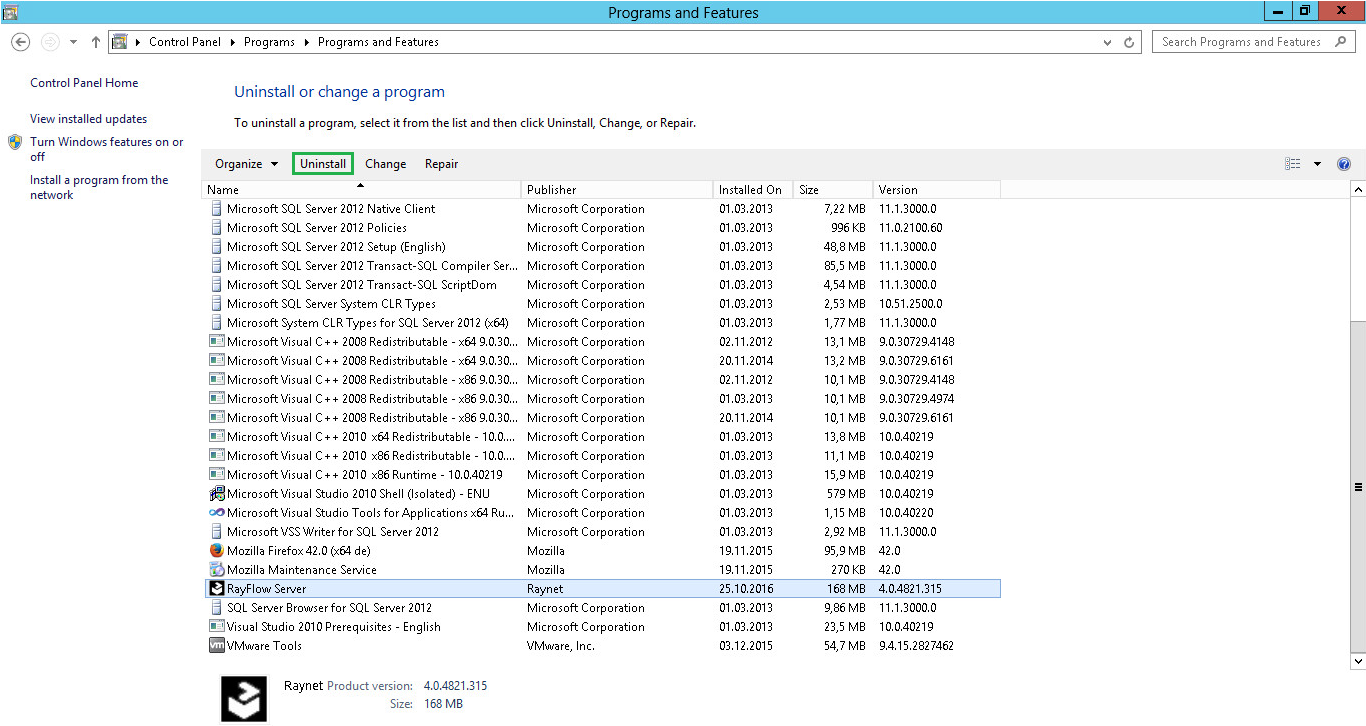
To uninstall RayFlow Server use the Windows Control Panel. In the Uninstall or change a program section, select the entry for RayFlow Server. Right-click on the entry and select Uninstall from the context menu.
|
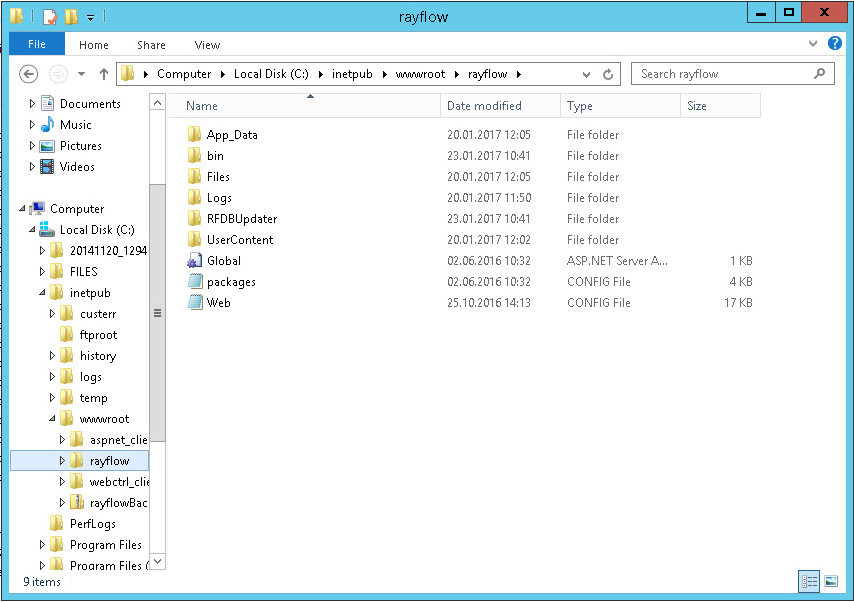
Be aware: Folders which contain customized data (icons, license files, files uploaded to tasks, etc.) will not be deleted by this action and will remain in the %INSTALLDIR% or in its subfolders. |
In the screenshot below there is an example of data that will remain after uninstalling the old RayFlow Server.
3.Installation of RayFlow Server 8.0
Install the current version of the RayFlow Server to the %INSTALLDIR% folder using the MSI installer. Detailed information on how to install the new RayFlow Server can be found in the RayFlow Servier Installation Guide.
|
Warning: Skip the database creation during the installation! |
4.Edition of the New Web.config File
Open the web.config file which is located in the %INSTALLDIR% in a text editor and replace the connection string with the connection string of the old web.config file (see either the first or the second step). Save the changes to the new web.config file.
Example:
<!-- Your connectionstring -->
<connectionStrings>
<add name="RayflowEntities"
connectionString="Data Source=(local);Initial Catalog=Rayflow;Integrated
Security=True;MultipleActiveResultSets=True;App=EntityFramework"
providerName="System.Data.SqlClient"/>
</connectionStrings>
5.Upgrade the RayFlow Database
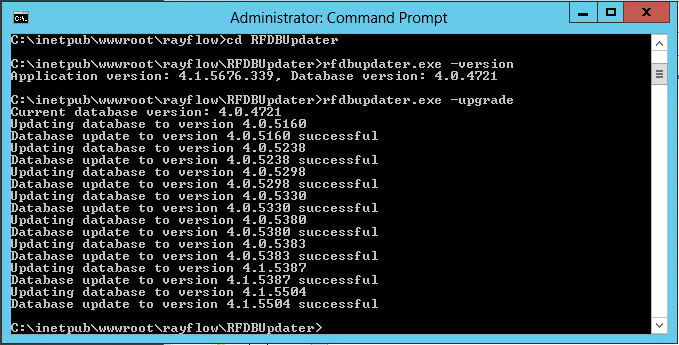
The database needs to be updated using the RayFlow-Updater. This is a simple console program which contains the four parameters which are necessary to update the RayFlow database to the latest state without the use of SQL scripts.
rfDBUpdater.exe –path %INSTALLDIR%\RFDBUpdater\ -upgrade –wait
The application itself is located in the following directory of the RayFlow Server installation: %INSTALLDIR%\RFDBUpdater\
Example of how to launch an update from a local folder:
rfDBUpdater.exe -upgrade –wait
Example of how to launch an update from any folder:
rfDBUpdater.exe -path %INSTALLDIR%\RFDBUpdater\ -upgrade –wait (with full path %INSTALLDIR%)
List of Arguments:
-path: The path containing the RayFlow Server installation. It is necessary for the Database/Connection string which will be taken from the web.config in the given path. At the same time, the path is the address of the SQL Scripts folder which also resides in the same folder. The path can be omitted if the command is launched from the RayFlow Server installation folder.
-upgrade: Using this parameter will update the database to the latest state.
-version: Get the current version of RayFlow.
-wait: Wait for a key action.
|
Note: If any errors are reported, please contact the support team. |
6.Manual Configuration
(The necessity of these steps depends on the environment.)
Internet Information Services (IIS) Restart
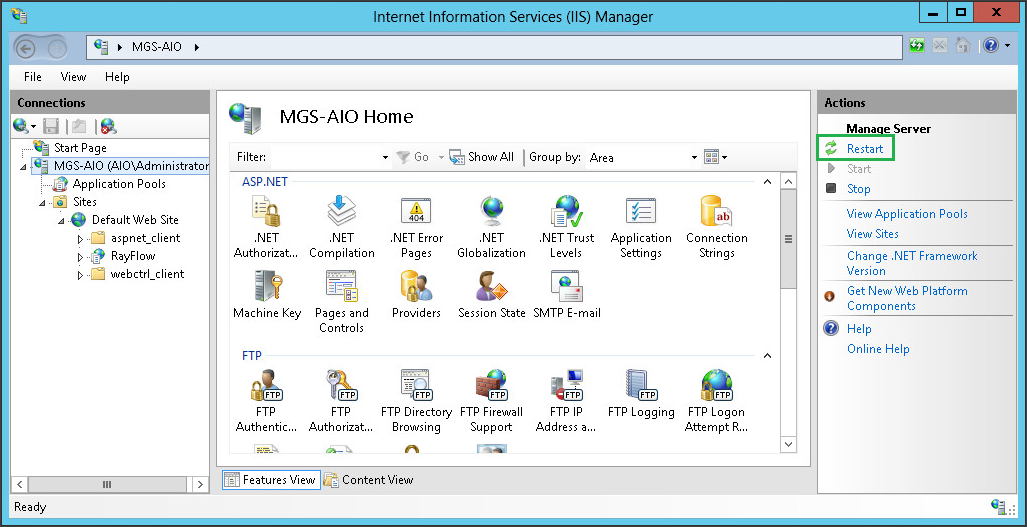
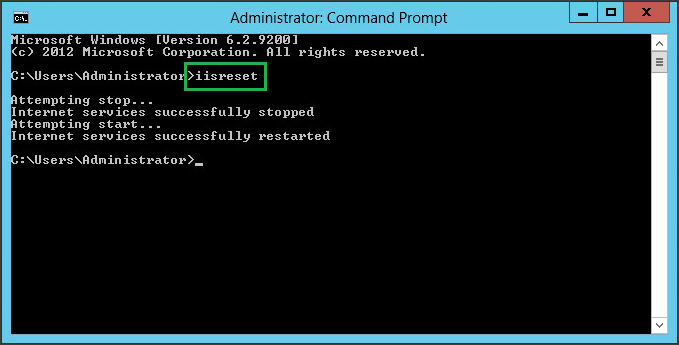
Restart the Internet Information Services either using the Internet Information Services Manager or via Command Prompt using the iisreset command line.
Internet Information Services Manager:
"iisreset" command line:
RayFlow License
If the previously installed RayFlow Server version has been a version prior to 4.0, it will be necessary to activate the RayFlow Server using a new .rsl license file instead of the old .license files that were used previously to 4.0. In this case, reactivate your RayFlow license by using the license activation tool or contact the Support Team using our Support templates. Information on how to reactivate a Raynet Product License can also be found in our KnowledgeBase.