RayFlow allows users to integrate RaySuite and other third-party products via the tools section of the configuration page. RayFlow desktop client uses this configuration to interact with other tools. This part of the document describes how new tools can be added and an existing ones can either be modified or deleted.
Tools Section Interface
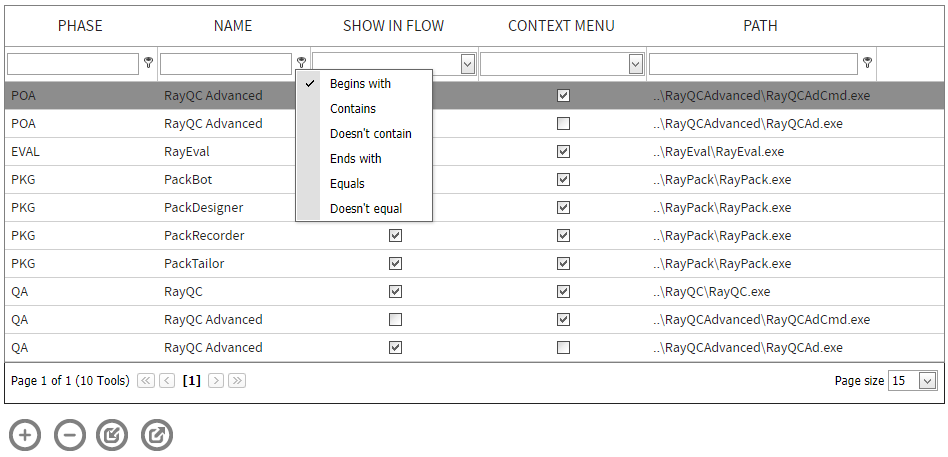
The tools section of the configuration page lists all the configured tools in a list manner. The order in which these tools are shown depends upon the assigned order number of the tools. Each of the tools configuration property is defined under a predefined column header.

A user has an ability to filter tools based upon an individual property. This can be achieved using the search field available beneath each of the column headers. The search criteria can be further modified by using the search modifier tool, which is available to the right of the search field.

Working with the Tools Section
To Add a New Tool
1. Go to Configuration -> Tools
2. Click on the Create new tool button to add a new tool. This button is available at the bottom of the view
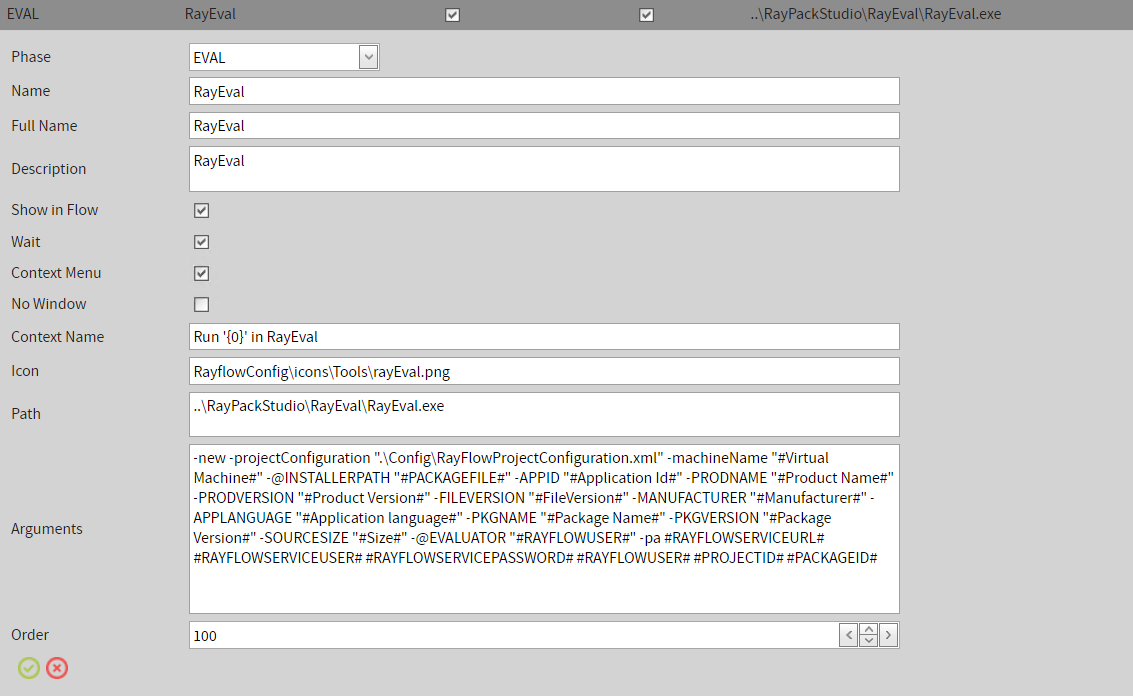
A list of tool property fields are now available
•Phase: Select the phase within which this tool will be used from the drop down list.
•Name: Short name of the tool
•Full Name: Full name of the tool
•Description: Description of the tool
•Show in flow: Makes the tool available within the RFC’s workflow process. This way it can be run in standalone mode.
•Wait: Waits for user input and prevents access to the RFC.
•Show in context menu: Allows the tool to be used via a task within a phase including the value from a specific datafield.
•No window: Hides the console window if a tool is executed via a window.
•Icon: Path to the tools icon file. Normally it is stored under the following path: path\RayFlowClient\bin\RayflowConfig\icons\Tools\.
•Path: Path to the tool. Relative paths and Windows environment variables can be used as part of the path.
•Arguments: Arguments passed on from RayFlow client to the tool, if launched via context menu.
•Order: Order number of the tool
3. Enter values for the properties

4. Click on the Save button to finalize adding the tool. Select the Cancel button to discard the changes.
 |
Save button |
 |
Cancel button |
After saving the changes, the new tool is now shown as part of the tool list.
Editing a Tools Configuration
Configured tool properties can be edited by clicking on the edit button. For each of the tools this button is available on the right after tool property Order.

Deleting an Existing Tool
Click on the Delete button, which is available next to the edit option, to delete the tool.

Exporting and Importing Tools Configuration
Some of the tools have standard configuration, which can be used for different projects and instances of RayFlow. Creating each of these tools manually and then configuring them is high manual effort.
RayFlow Tools configuration page allows user to export existing tools configuration as .xml file and then import it to another project.
Exporting Tools Configuration
To export tools configuration from a project, first navigate to Tools Configuration page. At the bottom of this page is Export Tools button. Selecting this button will export the tools configuration in a .xml format file.
 |
Export Tools |
Importing Tools Configuration
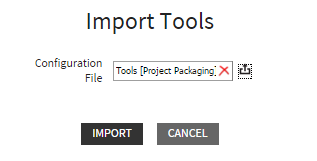
To import a list of tools with their configuration into a project, select the Import Tools button. This will pop-up a Import Tools dialog. Specify the path to configuration path and then click upon Import button. When successfully imported, a success message will be shown at the bottom and the tools configuration page will be populated with the imported tools.
 |
Import Tools |

Additional Information
Database
Information pertaining to tools configuration is stored in the dbo.Tools table of the RayFlow database.
Tools and Package Path
Package Path property links to the datafield, which actually holds the path to the package, which is linked to the current task. This property is important to be set because, when using RaySuite tools, the argument Application Path/ Package Path, gets its value from the same field.
Where can this be set?
The Package Path property can be set under the Basic Configuration page.

Tools and RayFlow Client
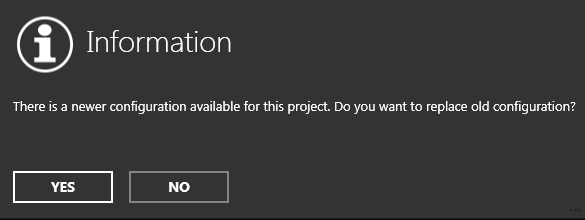
Every time RayFlow loads a project by connecting to the database (log in, project selection and refresh); the client using its web service checks the version of configuration in the RayFlow database. If a new version is available, it prompts user to accept and download the new configuration information from the database.

Important Files:
Located under %Appdata%\Roaming\Raynet\Rayflow\Config and DIR\RayFlowClient\Config folder
This file contains following information:
•RayFlowServer="http://172.189.xxx.xx/rayflowserver"
•RayFlowAdmin="Admin"
•RayFlowPassword="xxxxxxxxxxxxxxxxx"
•AskWhereToSaveBeforeOpening="No"
•StartFullScreen="Yes"
•RememberLogin="Yes"
•RecentLogin="Admin"
•PathFieldName="Application Path"
•TimeOut="100000"
´
RayFlowConfiguration.xml file
Located under the %Appdata%\Roaming\Raynet\Rayflow\Config directory
RayFlow client downloads and stores the tool configuration in this file.
For more information on RayFlow client and how it uses the configuration to interact with other tools, please refer to the RayFlow Client User Guide.